Feb 27, 2007

La-Zog-Nee...

I promised it a week ago, here it is again... Recipe Tuesday, this time it's Sic_un's Lasagne. And he (again!) said this was 'meh'. It was good. And I'm not a huge fan of lasagne, so that's saying something. Let's go to the kitchen with Sic_un

Sic_un's Lasagne

1 lb mild Italian sausage
1 lb lean ground beef
1/2 medium onion, finely chopped
1 bell pepper, coarsely chopped
1/2 medium onion, coarsely chopped
1/2 cup diced black olives
2 cans petite diced tomatoes with garlic and basil (14.5 oz cans)
2-3 cloves garlic, finely minced
2 cups tomato sauce (2-8 oz cans)
1/2 tsp sage
1 tsp fennel
3/4 tsp basil
1 tsp oregano
1/2 tsp thyme
1/4 tsp Jane's Mixed up Pepper (if you can find it. If not, Mrs. Dash or equivilant)
1/4 tsp fresh ground black pepper
1 box dried lasagne noodles
4 to 5 cups shredded mozzerella cheese (can also use 'italian combination')

Preheat oven to 375.


Brown Italian sausage in large sauté pan over medium heat. Drain fat, set aside. Brown ground beef in large sauté pan with finely chopped onion over medium heat. Drain fat, add reserved sausage to beef in pan.


Stir in garlic, mix to combine. Add coarsely chopped onion and bell pepper. Stir in 1 can diced tomatoes, 1 can tomato sauce. Mix, bring to a bubble over medium heat.
Add herbs, remaining tomatoes and tomato sauce, and olives. Taste, adjust salt and pepper. Reduce heat to low, and simmer for approximately 1 hour.


Prepare noodles according to package directions.
Layer into a 13x9 baking dish as follows:
Noodles
Sauce
Cheese
(Sic_un ended up with 3 layers.)
(He wanted me to specifically show the pan size issue solved. You layer a noodle over the blank spot.)


Bake for approximately 30-45 minutes or until cheese is bubbled and slightly browned. (at this point, the camera ran out of batteries. Sorry)
(and because he'll call me on it, Sic_un actually had the herbs split up into 3 additions-one with beef browning, one with the 'add herbs', and one during the simmer process)


AND....
I found Mom's Christmas Present.... She's got throws, she's got afghans, she's got blankets. She doesn't have a quilt.
a real honest to goodness Tennessee quilt... Pinwheel pattern and it matches her bedroom.

Pie, pie, everybody loves pie...

I blame my love of lemon meringue on my mother. She makes a mean lemon meringue, at least as far as flavor goes. Her meringue is loose and tends to get really weepy after a little bit, but the flavor... She's where I learned the power of just a little lemon peel, although she was more likely to grab for the lemon extract. Still, I blame my love of this particular pie on my mother. I knew it was special if she made lemon meringue.

I had lemons, I had butter, I had sugar and flour and eggs. Sounds like pie, doesn't it, Dear Reader? Let's go to the kitchen.

Lemon Meringue Pie
1 Baked Pastry Shell (recipe below)
3 eggs
1 1/2 cups sugar
3 tablespoons all-purpose flour
3 tablespoons cornstarch
Dash salt
1 1/2 cups water
2 tablespoons butter
1 to 2 teaspoons shredded lemon peel
1/3 cup lemon juice
Meringue:
3 egg whites
1/2 teaspoon shredded lemon peel
6 tablespoons sugar

Prepare pastry shell (see below), set aside. Separate egg yolks from whites, set whites aside for meringue. Stir 1/2 teaspoon lemon peel into 6 tablespoons sugar for meringue (flavors the sugar). Heat oven to 350 degrees. Zest your lemons, juice your lemons. I got the juice and peel from 2 medium sized lemons. I would say aim for 2, but use up to 4 if you have to.


FILLING:
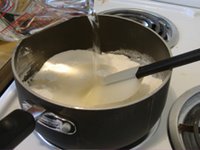
In a medium saucepan, combine sugar, flour, cornstarch, and salt.
Gradually whisk in water.


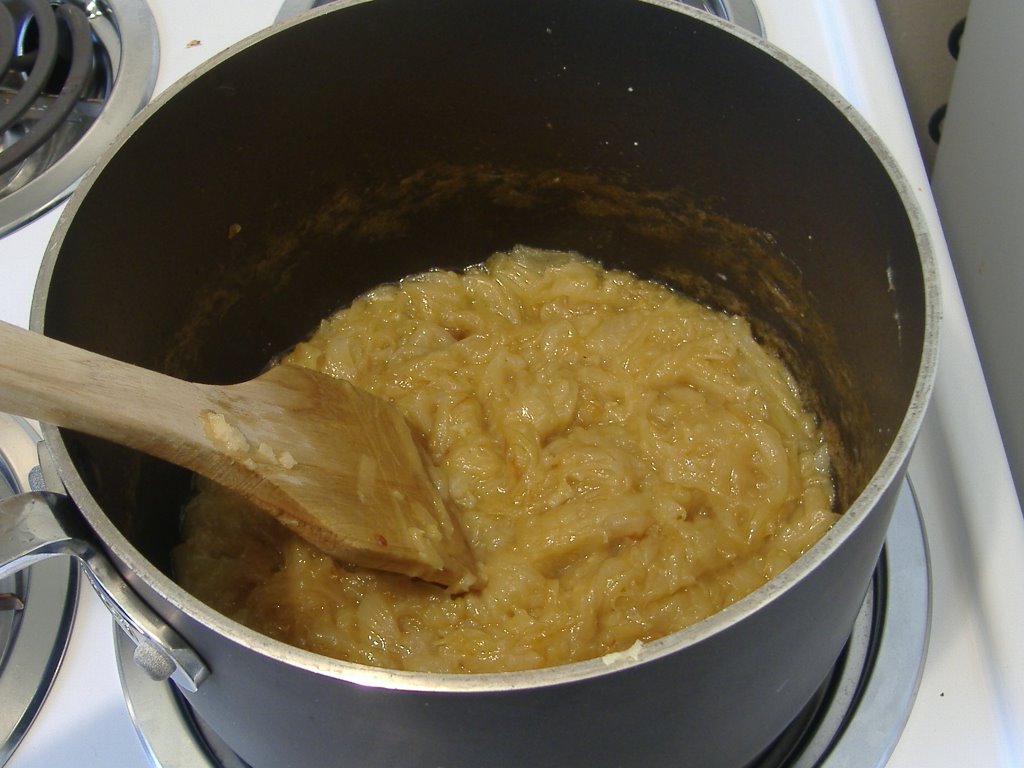
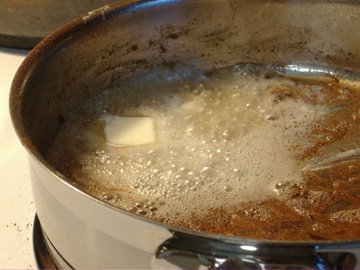
Cook and stir over medium heat until mixture thickens and bubbles. [This is where it turns away from food into a science project. You know those petri dishes filled with agar they used to use in biology class? Yeah. You'll recognize it when it gets to this stage. See?]
Reduce heat when mixture bubbles. Keep stirring and cooking for 2 more minutes. Remove from heat.


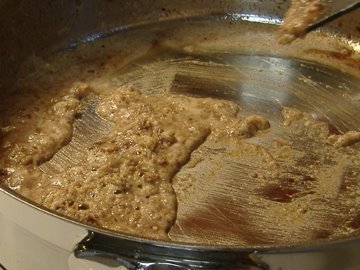
Slightly beat egg yolks with a fork. Stir in 1 cup of the hot mixture into the egg. Blend well.


Return mixture to saucepan. Bring to a gentle boil. Reduce heat, cook and keep stirring for 2 more minutes.
Remove from heat. Stir in butter and lemon peel.
Stir in lemon juice. Keep filling warm while you prepare the meringue.


MERINGUE:
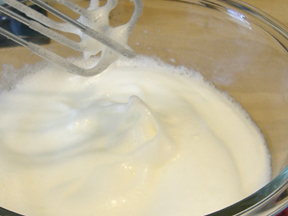
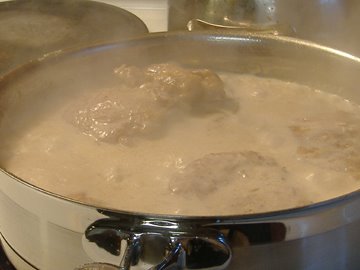
In a glass, copper or stainless-steel bowl, start mixing the egg whites with an electric mixer on medium speed until soft peaks form.


Gradually add the prepared sugar a tablespoon at a time, mixing each tablespoon in thoroughly. Keep beating on high speed until stiff peaks form and the sugar dissolves.


Pour hot filling into baked pastry shell.


Top with meringue, being sure to seal to the edge of the pastry. Then mound into the center of the pie.
Bake at 350 for 15 minutes.
Cool on a wire rack for 1 hour.
Chill for 3 to 4 hours.
Slice and serve.


LEMON MERINGUE PIE

Baked Pastry Shell:

1 1/4 cup all purpose flour
1/4 teaspoon salt
7 tablespoons unsalted butter, chilled and cut into pieces
1 to 2 tablespoons cold water

Combine the flour, salt and butter in a medium bowl. Either cut with a pastry blender or rub with your fingertips until the mixture resembles coarse crumbs. Add the water 1 tablespoon at a time and mix until the dough comes together and is no longer dry, being careful not to overmix. Form into a disk, wrap in plastic, refrigerate for 1 hour.
You can also throw the butter, flour and salt into a food processor and pulse until it looks like coarse crumbs. Drizzle the water in until it gathers together and starts to pull away from the sides of the container. Gather it into a disk, wrap in plastic, refrigerate for 1 hour.
Roll out the dough on a lightly floured surface, fit to the pan. Rest in refrigerator for 1 hour. Dock crust with tines of fork. Line crust with 2 layers of regular foil or 1 layer of heavy foil. Bake at 450 for 8 minutes. Remove foil. Bake an additional 5 to 7 minutes or until golden. Cool.


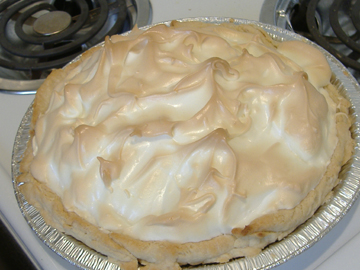
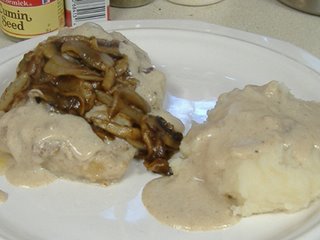
I was actually concerned, and apologized to Sic_un for the quality of my meringue. It's tight. Meaning small bubbles, tight foam. I should have apologized for the crust. I don't have a rolling rig, you see. So I was (really!) using one of my white cutting mats (perfectly acceptable substitute for a rolling mat) and (ahem) a can of soup. Yes, Dear Reader... I made my crust using a can of soup as a roller. I'm ashamed. But I did make the crust. Next time, I may just get a frozen crust and make it a bit easier on myself. Also, I was concerned the meringue might get a little weepy or slippery on the pie, so I heated the finished mixture over medium heat for about 2 minutes after I finished whipping the meringue. It cooked up the mixture really pretty. I actually ended up getting the meringue a little too baked, so it did this seepy thing where the oil from the lemon peel came through the meringue after it cooled. No harm, no foul. And it really is really really good. Make a pie, Dear Reader.
Oh, and points to you if you can name the movie the title of this post comes from.
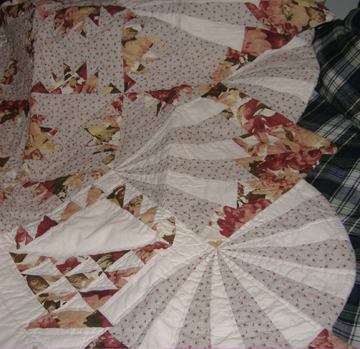
What A Crock!

When I was somewhere around 12 or 13, my mom got her crock pot. Of course, it was from Montgomery Wards, it wasn't crockery (although it was non-stick) and she still uses it today because it's what she has and it works for her. I never liked the thing. You could, admittedly, get stuff started on the stove for really good browning and carmelization and then braise it, but it always simmered out and dripped because the lid never fit tight. It was also a multi-tasker, with a separate heating tray that you could presumably cook on itself. But I never liked it. It wasn't something I felt I could set to low and let it cook all day long.

So I asked for a Crock-pot last Christmas (or maybe the one before...hmmm. Maybe smoking the demon weed does kill brain cells). In Albuquerque, I only cooked with it once or twice. Make that 3 times. After the first time I cooked something in it, I picked up a box of those Crock-pot liners. They work. I dig them. I like everything that means I don't have to scrub a dish.

It's pot-luck season at workplaces around the country, and that means Crock-pot. My supervisor at work seems to have instituted a pot-luck-a-month. For October, it was the 'halloween fest'. I brought doughnuts for the morning sugar rush. This time around, our 'Thanksgiving potluck' is tomorrow. I'm making...(drum roll please) Smokies. Apparently, it's somewhat of a common appetizer/pot-luck dish. I hadn't had it until Easter a year ago when K, L's girlfriend at the time, brought it to Mom's. You won't get a finished picture (that's at work, and no camera at work. Sorry), but I'll walk you through what I'm doing. Enjoy, Dear Reader. OOOH. And just to make it a bit easier, just about everything in here is pre-made except just a couple of things. Meaning it's quick and easy too.

Smokies
"X" 14 oz. packages small cooked smoked sausage links (I use Hillshire Farms). Figure it out according to how many people you have to feed using 2 ounces for each person. 2- 14 oz. packages (they were cheaper than the 2 lb package) will feed my team of 14 people.
1 cup bottled barbecue sauce (I'm using Cattleman's. Hey, it's work, what can I say?)
1/2 cup brown sugar
1/2 teaspoon Worcestershire sauce
1 teaspoon fresh grated ginger
1 teaspoon yellow mustard


Line your Crock-pot. You'll thank me at clean-up time. It's sugary, meaning if it burns ANYWHERE, you're stuck.


Mix the sauce ingredients in a separate bowl first. (do I need to remind you to taste and adjust to your own liking?)


Put the sausage in the Crock-pot.


Pour in the sauce and stir. Cover and cook on 'High' for 2 1/2 to 3 hours.

Ready to heat

Now. Since this is for work, this goes in the fridge (no, no pictures of my fridge. It's an old one from the late 70's and it's... funky and not fun) tonight and then I'm putting it into my Crock-pot carrier and going in the a.m. Plug it in at work (I'm essentially 10-8, with lunch at 1... makes it 3 hours. Isn't that convenient??). Stir before serving (bring a spoon and/or tongs. They can dish their own). TA DA!

Wasn't that easy? Oh, come on... You're just ashamed to admit it looks pretty damn good, even uncooked. I dig them. Enjoy, Dear Reader.

Danke Schoen... EEEK

oh my darling, Danke schoen...

Just a quickie hats off to Miss Syl, who let me know blogger had me down for a few.

Recipe Tuesday is um, well, not here.

I could do the soup I made tonight... Stir up about a pound of beef chunks (mine was chuck and round stew meat) with seasoned flour (salt, pepper, chili powder, marjoram, oregano). Sear it up, throw in some onion and garlic while searing, add water and broth (1 can each), scrape up the bits, throw in carrots and celery, add spices to your liking (season salt, sage, marjoram, basil, worcestershire sauce), throw in some chopped potatoes, let simmer about 45 minutes or until veggies are softened as much as you want them. Serve it with the bread of your choice.

EEK. Before you know it, it's a RECIPE TUESDAY!!!!
Menu for Thanksgiving next week and a recipe for smokies (work potluck).

Ooooh lala!


Greetings, kids! It's time once again for Recipe Tuesday. I saw this recipe made on Paula Dean one day, and never having had it, thought it tasted pretty good in my head. But wait, you think/say/exclaim (insert at will)... What is this... dish?

French Onion Soup.

Wait! I don't mean the powder stuff. I don't mean something ordered in a restaurant. I mean one of the easiest-to-make dishes in the world, although it does take some time. This is the sum of about 8 different recipes I found. And you can have your shortcuts with some things in it, but really. French onion soup. The peasant in me just shivered with delight. How rustic. How filling. Especially with fall everywhere (those are some really cool leaves around here at the top). Hot and tasty. And filling. Shall we, Dear Reader? Let's go to the kitchen.

French Onion Soup

6-8 medium onions*, sliced lyonnaise (lengthwise) (yes, it's a lot of onions)
1/4 cup butter
1 clove garlic, minced
1/2 teaspoon ground black pepper
1/2 cup beer**
1 10oz. can of beef consomme
1 3/4 cups beef broth
1 cup water
Salt and pepper to taste
Slices of French bread/texas toast/croutons for topping***
Shredded/sliced cheese****


Melt the butter over medium heat, wait until just melted.


Stir in the onions. Reduce heat. Cover. After about 15 minutes, after the onions have sweated down a bit, stir in the pepper.


Continue to cook, stirring occasionally, until onions are pale golden to medium caramel. Be patient, this can take awhile. Mine went about 1 1/2 hours.


Raise heat to medium, add garlic. Stir and cook over medium heat for 2 minutes. Stir in the beer and reduce, stirring frequently, until syrupy.


Add the consomme, broth and water. Taste. Add salt and/or pepper to taste. Bring just to a boil.
Reduce heat. Simmer about 20 minutes.

While the soup is simmering, toast your bread under the broiler, cook your texas toast to package specs, open the croutons, make your croutons... Whatever you decide to use to top it. I used cheese-garlic texas toast rounds. SO I cooked them according to package specs.
Taste your soup. Last chance to make any updates to the seasoning.


Dish into bowls or cups (I used bowls, Sic_un said he's never had it in anything but cups). MAKE SURE THEY ARE OVEN SAFE.
Top with bread/toast/croutons. Sprinkle with sliced/shredded cheese.
Broil until bubbling and/or brown.


Enjoy.


FRENCH ONION SOUP

* I used all sweet onions. I wish, after making it and tasting it really, that I had used a mixture of sweet and yellow onions.
** All the recipes had some kind of pan de-glazer. I had beer, I used beer. Wine on hand? Use that. Apple juice? Use it. Brandy? Go for it. I had beer, I used beer. I saw a recipe that used cola.
***Cut the bread into slices, butter each side, toast under the broiler until crispy and golden. Use what flavors you like. I used garlic/cheese.
****Tradition is provolone. I used shredded cheddar because it was on hand. Think of this with a brie. Damn. Ooooh... Queso Blanco. MMmmmm.
Happy Tuesday, Dear Reader. I thought and thought and thought what the HELL to do for Recipe Tuesday. Even I get quite bored with chicken every now and again. SO... I decided to do something quick and easy, both to prep and cook. Beef Fajitas. Now, please note, Dear Reader... These are not like my Cheater Fajitas. These actually require ingredients. You may insert one smile here. That being said, they really are quick and easy. Prep time on them should, with all the slicing involved, take maybe 15 minutes. Marinating time is however long you decide to marinate them (I need something that can be thrown on literally on a moment's notice... I'm home from work, but Bro isn't off his final yet and Sis isn't home from work yet [[I don't think. There is evidence someone was here earlier, but nobody's home right now 'scept me]]). Rather than make something and have it get cold before everyone gets here, I thought I'd make something that can be thrown on 'whenever'. I only wish Blogger was cooperating with my images. I had to load them all in the good old-fashioned html way. Forgive the size. That being said... Shall we go to the kitchen, Dear Reader?

Steak Fajitas
1 1/2 pounds round steak, sliced across the grain into 1/4 inch wide slices
1/4 cup vinegar (I used red wine vinegar and cider vinegar, equal parts each, mixed)
1/4 cup olive oil
2 tablespoons worcestershire sauce
2 teaspoons garlic powder
2 tablespoons chili powder
2 tablespoons crushed red pepper
1 teaspoon dried cilantro (dried 'cause it's a marinade. Use 3x as much fresh if you can get your hands on it)
Juice from 1 lime
salt and pepper to taste
2 bell peppers, sliced thin (I used 1 green,1/2 orange and 1/2 yellow... combine how you like)
1/2 to 1 full onion, julienned (I used 1/2 an onion... didn't want to overpower)
large 'burrito' size flour tortillas
Tomatoes (garnish)
Sour cream (garnish)
salsa (garnish)
shredded cheddar cheese (garnish)

In a non-reactive dish, mix together the vinegar, olive oil, worcestershire sauce, garlic powder, chili powder, crushed red pepper, cilantro and lime juice.

Toss the thinly sliced beef to coat, refrigerate until you're ready to cook.

In a large saute pan (I used non-stick for cleaning reasons), heat 1 tablespoon olive oil. Add onion, cook until soft. Add bell pepper, cook until mostly soft.


Remove beef from marinade, salt and pepper the beef to taste (should be about 1 teaspoon each). Cook the beef to desired doneness (I like it medium rare). Remove from heat.


Build your fajita using a tortilla base, meat mixture, then garnish to taste.


Enjoy.

Notes:
On the cilantro: Bro agrees with me, cilantro is heavily overused in most dishes. A little is good. Don't chop up cupsful of it and expect to taste anything but cilantro. A little in the marinade goes a long way.
Play with your spices, Dear Reader. You can add tabasco to the marinade, you can add salsa to the marinade. I did what I like with it. Don't be afraid to experiment (one man's kink is another man's perversion). Play with your food, Dear Reader. Instead of using bell peppers, you can throw in some chopped roasted red peppers. You can use chipotle peppers and their adobo sauce. You can use jalapenos. Play! Different vinegars are red wine vinegar, white wine vinegar, tarragon vinegar, cider vinegar, basalmic... PLAY!
Possible garnishes can include lettuce, guacamole, refried beans, spanish rice, more onion, mushrooms, sauteed garlic, green onions, chutneys, salsa fresca (easy salsa fresca: chop up tomatoes, onions, cilantro, green onions and jalapenos, mix to combine), jalapenos, habaneros... Again, play with it.
And as always, let me know what you think.

One last thing, Dear Reader....


It's food. PLAY WITH IT!

Chicken Piccata and Smashed Sweet Potatoes...

As promised, unduly interrupted by barbecue cravings last week, we're going to make Chicken Piccata, Dear Reader. It's accompanied by Smashed Sweet Potatoes, and I think we were all surprised at how well it all went together. Main dish first, then the side, then any tips.

I'm hungry, so shall we go to the kitchen, Dear Reader? Oh... Pictures will be added later, since Blogger is being a bitch, mmmkay?
**edit** Just tried, it's still being a bitch. Both about uploading (for me) and just carrying over from a url. So what's going on? I have no idea. Ah well. No pictures. Sorry.


Chicken Piccata
1 1/2-2 pounds boneless, skinless chicken (I used thighs, feel free to use what you like)
1/2 cup flour
1 teaspoon garlic salt
1 teaspoon fresh ground black pepper
1 can OR 2 cups chicken broth
juice from 3 medium lemons, reserve 1 tablespoon
Approximately 2 tablespoons capers, rinsed and drained
3 tablespoons olive oil
4 tablespoons butter


Now, I recommend doing ALL THE PREP FIRST. This dish cooks QUITE quickly once you start, so if you can start out with everything ready to go, you'll be that much ahead of the game.

Prep: Flatten the chicken until it's 1/4 to 1/2 inch thick. Be sure to pound only on the 'cut' side, since what would have been the skin side will keep the chicken together. Mix the flour, garlic salt and pepper together in a dish or on a plate. Rinse and drain the capers, get the lemon juice ready to go. Dredge the flattened chicken in the flour mixture, both sides.

Heat 1 tablespoon of the oil and 1 tablespoon of the butter over medium high heat.
Brown the chicken IN BATCHES until golden. I had 6 thighs, I did 3 batches. Each batch got 1 tablespoon oil, 1 tablespoon butter. Reserve on a plate to the side.
After the chicken is cooked, pour in the chicken broth, lemon juice and capers. Bring to a boil, scraping up the fond. Reduce by half. After you've acheived the reduction, stir or whisk in the remaining tablespoon butter. Add the chicken back in, remove pan from heat. Feel free to leave it in the pan, warm, while you throw together the potatoes.


Now for the side. This is the EASIEST SIDE DISH you'll ever make, guaranteed. You'll need your microwave for this one, Dear Reader. This makes 4 half-cup servings, so double as needed.

Smashed Sweet Potatoes
2 large sweet potatoes
1 tablespoon lemon juice (reserved from Chicken Piccata)
4 tablespoons butter, cut up into 4 pieces
1/4 cup milk
salt and pepper to taste

Rinse the sweet potatoes, removing any root bits and dirt. Poke each sweet potato 3-4 times with a fork. Place them on a paper plate, microwave on high 8 minutes. I did this part when I was doing the chicken. Leave the sweet potatoes in the microwave until the chicken is done and off the heat. Once you're done with the chicken, take the sweet potatoes out of the microwave, cut each in half lengthwise and scoop the insides into a microwave safe bowl. Add the reserved lemon juice. Throw in the 4 tablespoons butter, mash that in. Stir in the milk, salt and pepper. If it's not hot enough it melt the butter, it's not hot enough. Microwave it for 30 seconds.

Tada! There. Wasn't that easy???

TIPS:
Do the prep first. I cannot stress this enough, Dear Reader. It really does go quickly if all the prep is done.
If you happen to not use the lemon juice in the sweet potatoes, it's no big deal. Really. It just sharpens the sweet potato flavor, makes it sweeter without sugar.
Now, why didn't I put maple syrup or brown sugar or cinnamon or nutmeg or blah-blah-blah in the sweet potatoes? I'm sick of it, Dear Reader. For 36 years, I have had candied sweet potatoes with brown sugar and marshmallows for holidays. I've had sweet potato pie with cinnamon and nutmeg and brown sugar. I've had sweet potato casserole so sweet you'll get a cavity just LOOKING at the damn thing... Sweet potatoes are called sweet potatoes for a reason. THEY'RE SWEET!!! You do not need to add sugar. They're sweet enough.
But again, if you want to, go ahead.
Once again, Dear Reader, I'm using chicken thighs. The price of breasts has gone through the roof, and I'm not sure where it will end. Until then, if it's boneless and skinless, use it. The darker meat does do a better job of being juicy, I think.
Capers are the pickled flower buds of the Capparis spinosa plant. I bought them in a 3 1/2 ounce jar at the local WalMart for $2 and some change. THEY ARE NOT EXOTIC. Look for them with the pickles, relishes, cocktail onions and jarred olives. They come packed in vinegar and you WILL need to rinse them. Matter of fact, rinse them twice.

Ribs...And Easy Coleslaw..

Or... The Chicken Picatta will be next week, because we all had a longing for barbecue.

I have a confession, Dear Reader. I've been subjected to bad barbecue most of my life. Yes, yes, sad and (unfortunately) true, my family can't cook barbecue. I can, though, and so can Bro, who's the cook behind today's Recipe Tuesday. Warning on format: Bro doesn't cook with recipes, no measurements, no real 'recipe', a very devil-may-care philosophy towards cooking. So today's post is going to be more of a jumping off point, full of tips and hints and links, and show what he did and tell how I would do things, plus the easiest coleslaw in the world. Let's make us some barbecue, shall we?

Now, the barbecue I was raised with, and why I say I've been subjected to bad barbecue: My dad, to barbecue a chicken, for instance, would slather the meat with an over-the-counter barbecue sauce, maybe add a 1/2 beer to it, throw it on a hot grill and proceed to baste it with the sauce every 15 minutes or so until the meat itself was cooked. Only problem is that the chicken never absorbed the sauce, and indeed the sauce charred itself all the way to burnt way before the meat was done. The sugars in sauce cook before the meat is done and only end up burning. If you do chicken this way, STOP. Place the (preferably brined) chicken on the grill, let it cook all the way through, then throw sauce onto it for about 15 minutes. My mother would make a type of pulled pork in that she'd start a pork roast simmering in water and onions in the crock pot for hours, adding sauce about an hour into cooking. Simmer it down, pull it apart, voila... Pork barbecue suitable for sandwiches. Unfortunately, all you taste is the sauce, not the meat.

I'm talking barbecue today, Dear Reader. Marinades and rubs are designed to do what barbecue is all about... Add flavor to meat, slow cooked to break down collagens, make it fall off the bone in goodness that gets into your fingernails and makes your mouth happy. That's what barbecue is to me, that's what barbecue should be. And no... We didn't pull out the grill, just used the oven.


Bro started with a rack of spareribs and a marinade. His marinade was molasses, apple juice, a shot of key lime juice and a splash of red wine vinegar. If he had an injector, he would have injected it. Now, for the actions behind the marinade: Molasses and apple juice are sweet. The key lime and the red wine vinegar are acidic. Bathe your ribs in this for at least an hour, up to overnight, and you're on your way to flavoring the pork, getting the proteins malleable, ready for more flavor.


After the bath, he packed on a rub. You can go to Alton for any one of his rub recipes (pulled pork, baby-back ribs-- I really recommend the ribs), you can hit google for any rub recipes, you can go to your favorite chef site for any recipes, you can use a pre-done rub from the store. Or you can do what Bro did and make a rub using pretty much whatever is on hand. Remember, he took care of the sweet component with the marinade, so the dry rub can be as spicy as you like.

Bro's rub ingredients:
chili powder
cloves
garlic powder
cumin
pepper
mustard
nutmeg
tumeric
paprika
Tony Chachere's Creole Seasoning
McCormick Carribean Jerk Seasoning.

Lots of spice, and with the exception of the nutmeg, very little sweet. But that's ok. To get the blend you want, you can either go with a wet method (brining, marinade) and just cook it from that and then sauce the whole thing (if you use an over-the-counter sauce, go ahead and jazz it up how you like to highlight flavors you like), you can use a dry method, which is dry rub the whole thing and go from there, or you can use a combination of the two.

After letting the meat marinate for a couple hours, he then packed the rub on. And when I say pack it on, I mean he PACKED IT ON. This is the beauty of a dry rub. You can coat the meat with it the way it needs to be coated. Please notice the dish he used to marinate in. After removing the meat from the marinade, he reserved the marinade and then layered the rub over the entire section of rib. After rubbing, he returned the meat to the dish of marinade ('fat' side down, bone side up), then popped it into a 300 degree oven for about 4 hours, uncovered. He then dropped the temperature to 200 and let it cook another hour. NOW, the benefit of this low, slow cooking is that the collagens in the meat give up their hold on the proteins and they release all their juiciness into the meat. That's the key to fall-off-the-bone tenderness. How much collagen can you release into the meat? Collagen is tough stuff, Dear Reader. It hangs on. The meat can be done cooking before it's released, which is why ribs usually end up tasting 'dry'. Not enough collagen released=bad thing. SO... To acheive collagen release, use a low, slow cooking. But you do need some liquid in there to help it along. This is why he popped it back into the marinade after applying the rub. After 6 hours or so of cooking time at these low temperatures, the meat really did fall off the bone. Pictures don't do it justice, Dear Reader. That wasn't 'char', per se, it was the rub and how dark it had gotten. But it wasn't burnt. And it was good.

<-fresh from oven....


falling off the bone->


And yes, that's my coleslaw you see there on the plate with it. Bro cannot, apparently make coleslaw. Coleslaw is easy. Cut (don't shred) the cabbage (we used 1/2 of a head) THINLY. Add to that about 1/4 of 1 onion chopped very fine, then squeezed so there is almost no moisture left in it. Add 3 carrots, shredded and squeezed so they're dry. Then add 1 can of crushed pineapple, squeezed dry (reserve the juice!). Mix all that together, see how wet it is. Add about 1/2 cup mayonnaise, a dash of lemon juice, about 1 teaspoon of dried dill, a tablespoon or 2 of the reserved juice for additional flavor and liquidity, salt and pepper to taste. Be sure not to get it too wet, so go really easy on the liquids. Mix after every add-in, and remember... for a slaw to combine nicely, it has to be a bit on the dry side. It's EASY, and thanks go to my mom for teaching me how to make it.

Now... What I would do different... First, I'd take down what I put in the rub. Seriously. I like consistency in what I cook, especially if it comes out good. This came out GOOD, and I can guarantee you he will never be able to recreate it EXACTLY because he didn't put down what he put into it. I like Alton's 8:3:1:1 rub recipe. It works. And there you also have how I'd cook them. Yes, do the marinade. Get that moisture into the slab before you even look at the rub. I'd add in some salt and a bit of garlic to the marinade, along with some thyme, marjoram, and rosemary. Make more of a brine out of it. Soak the ribs as long as possible before applying the rub. I'd rub it about the same. Pack it on. Add it in. Make sure all nooks and crannies have been THOROUGHLY COVERED. Here's where he and I would depart in the cooking methodology, and where I'd let Alton guide through. I would have made a foil packet with the ribs, thrown in maybe one cup of the remaining marinade, place it on a cookie sheet, throw it into a 250 degree oven for 6-8 hours. Let the rib's own juices act as the braising liquid. Next barbecue will be mine, Dear Reader, and you know me... I'll give you a full recipe then. Until then, play with it. Read the recipes, watch the shows, hit your local barbecue place and see if the cook will give you a few tips. Talk to people you know that do barbecue. It's a fun subject, and you can spend YEARS perfecting recipes.
Do not be afraid to use a pre-made seasoning blend, if it has the flavors in it you want. Do not be afraid to use spices and experiment. If you have orange juice, use it! Ketchup or honey? Use it! It's food, not rocket science, although you may be a rocket scientist (insert one wink here, Dear Reader)... It's food. It should taste good. If that means that you experiment with 3 different rubs on 3 different pieces of meat on the same night, do it! Hit the store, pick up a rack of ribs and cut it into 3 pieces. Do one 'wet' (marinade and sauce only), one dry (rub only) and one wet+dry (marinade, rub). Or 3 different rubs, or pre-cook the ribs and then play with sauces. Experiment. Have FUN. Play with your food, Dear Reader! Let loose your inner cook!

Happy short week, Dear Reader.

Nov 12, 2006

Comfort Food

Since Sis had a fretful night (as did I... Got to be 3 a.m. and I was in the middle of this really incredible dream even though I was 1/2 awake and aware of everything going on outside--I'll think about posting it) and she was tired after work, I changed my mind. I was going to do a chicken picatta type thing (next week?), but instead decided to go the comfort food route. Chicken, floured and sauteed, pan gravy and mushrooms/onions. You'll see. It's good. Shall we go to the kitchen, Dear Reader?

Chicken-fried Chicken with Mushrooms and Onions

1 1/2 pounds boneless, skinless chicken (I used thighs. They're still cheapo compared to breasts)
1/2 onion, julienned
2 cups mushrooms, sliced thin
3/4 cup flour
1 teaspoon paprika
2 tablespoons olive oil
3 tablespoons butter, separated
2 cups milk
salt and pepper

To prep the chicken: Cut into 'serving sizes'. For me, that meant taking the 5 boneless/skinless thighs and removing the excess fat from each. If you're using breasts, you may want to slice them in 1/2. Just make sure it's boneless/skinless, because this has enough calories as is.
In a plastic bag, mix the flour, the paprika and about 1 teaspoon salt and 2 teaspoons pepper until well blended. Reserve 2 1/2 tablespoons of the flour mixture to the side. Toss the prepped chicken in the remaining flour mixture.


In a saute pan, heat the olive oil and 1 tablespoon butter over medium-high heat. Fry the chicken on each side until browned. Should take about 6-8 minutes each side. You may have to do this in 2 batches to get a good fry, do NOT crowd the pan. That will only steam the chicken, not fry it. Remove the browned chicken to a plate, leaving the oil in the pan.


Saute the onion in the remaining oil in the pan (and that lovely fond!) until soft...


...then add the mushrooms on top. Add about 1/2 teaspoon salt and 1 teaspoon pepper to this. Stir together over medium-high heat until the mushrooms are soft. This should only take about 3 or 4 minutes. With a slotted spoon, remove the onion/mushroom mixture to a bowl on the side and cover with foil or a towel to keep warm.


You should have a very small amount of the drippings remaining in the pan. If the mushrooms did what they were supposed to do, you shouldn't have very much left at all, but what you do have will be QUITE flavorful. To those drippings, add the remaining 2 tablespoons butter.


Add the reserved 2 1/2 tablespoons flour to make a roux (we've covered the gravy basics before here), stirring the flour constantly until it's a medium brown. Add the milk, continually stirring to avoid lumps. Bring to a boil. Add about 1/2 teaspoon salt, 1 teaspoon pepper.


Add the chicken back to the pan, drop the heat to medium low. Cover the pan, let 'stew' for approximately 10 minutes.


To plate: Piece of chicken, a small bit of the gravy (I did mainly to cover where I 'tonged' the chicken), then the reserved mushroom/onion mixture. I did mashed potatoes at the same time and took advantage of the gravy.


Chicken Fried Chicken with Mushrooms and Onions


You can also use rice instead of potatoes, not do a gravy, just top the chicken with the mushrooms/onions, or just saute the chicken without the flour mixture... I wanted a 'comfort' food, but didn't want to go to serious fry trouble AND didn't want to do something as heavy as the afore-linked steak. As always, let me know if you try it and what you thought.


--OFFBEAT EDITORIAL--
I'm surprised, almost on a daily basis, by the amount of people that actually hit the House™ through a search engine looking for recipes, or who pop in and comment. It seems a new face is added each week, so to speak. To that end, sometime in the next week or so, you're going to see a link on the side for Darkneuro's Kitchen™, where all the recipes in all their glory will be collected. IN addition... I know there's quite a few 'foodies' out there. If you like to cook, even if it's pulling a recipe from a book and adding your own touches to it, even if it's for taking ready-made stuff and making it better, SHARE. Join in on Recipe Tuesday. There's grower's markets that are going to be going gangbusters soon if they haven't already. Let's get cooking, people!!! I do the pictures 'cause I like photography and I think I'm good at it. That's me showing off 'skillz'. I'll take ego points where I can. You don't have to. But I'd love to have ya'll join in. It doesn't have to be every week, but what the hell, you know? C'mon... Share the recipes, share the love.