Chicken cordon bleu can be a pretty bland dish. It was developed at Le Cordon Bleu in the late 19th century, and means 'blue ribbon chicken'. Unfortunately, with chicken now being mass-farmed, there is almost none of the flavor present in the original dish. Mass-produced ham and cheese can also affect that 'blue ribbon' flavor, but you don't have to buy the most expensive thing at the store. I used standard ingredients available in ANY grocery store (tyson chicken, pepperidge farms honey ham, kraft swiss cheese slices). Brining the chicken beforehand takes care of some of the flavor aspects that would be missing from the dish. It also takes care of a lot of seasoning while the dish is cooking.
Chicken Cordon Bleu
boneless, skinless chicken breasts (1 per person for however many you're feeding), pounded to about 1/2-inch thickness, brined for at least 2 hours before cooking
1 to 2 ham slices per chicken breast (you can use canadian bacon, proscuitto... it's all a variety of ham)
1 to 2 swiss cheese slices per chicken breast (you can sub your favorite type of cheese too)
Seasoned bread crumbs (you can make your own or buy... I bought)
1/3 cup milk, cream or half&half for dipping (I used half&half)
BRINE:
1/4 cup salt
2 cups water
1 teaspoon pepper
1 teaspoon basil
2 scallions, chopped fine
To prepare the chicken, pound the chicken breasts to about 1/2 inch thickness between 2
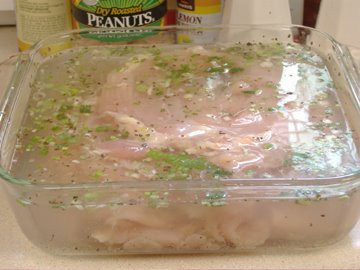 sheets of plastic wrap. You can use a mallet, another pan... I've even used a hammer when that was the only thing available to me. To brine the chicken, mix the water, salt, scallions and spices in a microwave safe dish, heat for 2 minutes on high, cool with 6-8 ice cubes. Once it's cooled down to about room temperature, add the flattened chicken breasts, cover with plastic wrap and refrigerate until you're about 1 hour away from mealtime. This actually flavors the chicken itself and make it more tender and more juicy.
  To assemble: Heat the oven to 375 degrees. Remove the chicken from the brine and pat dry with paper towels. Place ham slices and cheese slices, 1 to 2 slices of each in each chicken breast, roll and secure with toothpicks (this is optional,
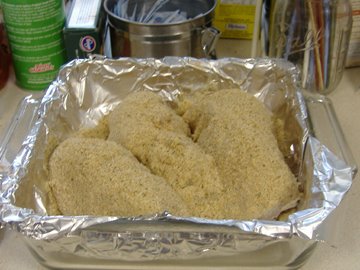 I never do... just make sure it's rolled tight and stays that way). Take each roll, dip into the milk, then coat each roll in breadcrumbs. Set the rolls side-by-side in a baking dish. Bake about 45 minutes or until the chicken juices run clear when poked. Serve with your favorite side dishes.
TIPS: I like to sprinkle the breading into the pan and also over the rolls before baking. If any cheese leaks out, it's caught by the bread crumbs, reducing the mess.
As always, if you cover your baking dish with foil, you don't have to worry about clean-up.
Various breadings can be used. I used pre-seasoned italian style bread crumbs. You can also use panko, make your own breadcrumbs... I've even used crushed cereal (corn flakes, wheat flakes, crushed rice krispies) as a coating. If you do make your own crumbs, please remember to mix in some seasonings.
I also don't worry about how long it's in the oven. Because you brined, there will be more 'flex time' that the chicken can be in the oven without drying out. I've pushed brined chicken to 220 degrees (that's 50 degrees hotter than the USDA says is a 'safe temperature') with ZERO loss to juiciness. Every chicken in the oven should be brined.
Instead of using sliced cheeses and ham, you can use chunks of cheese and ham. Just be sure that it rolls up completely so it doesn't fall out and you should be good. If you use large chicken breasts, or if you wind up with a huge sheet of chicken to fill, this may be an easier idea.
Don't be afraid to experiment with this. Chicken Kiev is made much the same way, only instead of meat and cheese, it uses a compound butter. Play with the slices in the center, play with the breadings. You can really have fun with this, and it really is a no-hassle dish.

No comments:
Post a Comment