Nov 10, 2007

Sopapillas

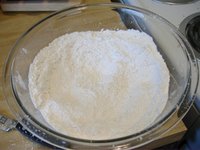
It's really just a little taste of New Mexico. There is a restaurant in town that serves something they call sopapillas. They're actually pan-fried tortillas that have been dusted with cinnamon and sugar. I wanted the pillowy goodness that is the sopa of countless meals in New Mexico. Slathered with honey, dipped into salsa, used to scoop up beans, the sopapilla I am used to is a deep-fried hollow piece of bread dough. Mom made them once, from a mix. We always got them at restaurants, though, and in Albuquerque, you have a lot of restaurants that serve sopapillas. Here in TN? No. At least, not that I've been able to find or afford. So they don't exist here. Until today. Today, I used the recipe for Sopaipillas de Levadura from a cookbook the local utility company sells.

My little taste of New Mexico. Notes at the end.

Yield: 4 dozen medium sopaipillas        Total Frying Time: 15-20 minutes
Temperature: Medium-High Freeze Well

1 package active dry yeast 1 1/2 teaspoons salt
1/4 cup warm water 1 teaspoon baking powder
(105°-115°F) 1 tablespoon sugar
1 1/4 cups scalded milk, cooled 1 tablespoon shortening
4 cups flour Shortening

1. Dissolve yeast in water and add to milk.
2. Combine dry ingredients in a medium-sized mixing bowl and cut in
shortening.
3. Make a well in center of dry ingredients. Add liquid to dry
ingredients and work into a dough.
4. Knead dough for 10 minutes, or until smooth; cover, and set
aside.
5. Heat 2 inches of shortening in a heavy pan at medium-high heat.
6. Roll dough to a 1/8 ingh thickness on a lightly floured board. Cut
dough into 4-inch squares and fry until golden on both sides, turning
once. (If the shortening is sufficiently hot, the sopaipillas will
puff and become hollow shortly after being placed in the shortening.)
7. Drain sopaipillas on absorbent towels.

NOTE: Sopaipillas may be served as a bread with any New Mexican menu. They may be served with honey, dusted with a sugar-cinnamon mixture and served as a dessert, or may be filled.
Sopapillas
I just copied the recipe. I followed it to the letter. Now for the notes? I was the only one eating these. I should have cut the recipe in 1/2. As is, I put 1/2 the dough in the freezer, tightly sealed in plastic wrap and a bag. We'll see how it does. The measurement of 1/8 in the thickness is not a random number. Thicker, and you'll have an underdone sopa. Thinner and you run the risk of losing the puff.
This recipe doesn't talk about rise. The dough does rise. The longer you let it sit, the puffier it gets. Punch it down and roll it out. You'll notice puffier pieces when you fry it up, to the point where it may pop a hole in the sopa. However, the 10 minutes or so it takes to get the shortening up to temp is long enough for a rise for this dough.
Let your yeast dissolve for about 5 minutes or so. Don't just dump it on in.
Scalding milk: Some will say this step is unnecessary. I find it to be completely necessary. The milk was thicker, the natural sugars in the milk came through more (I tasted it), and it wasn't just milk. It had been changed. SO SCALD IT. Heat it over the burner in a small pan, medium heat, until a handy thermometer reads 180. Stir frequently. Take it off the burner. That's it. No big deal. And it really does sweeten the milk.
Kneading: USE FLOUR. The dough is sticky, but you won't need much. I had a handful on the mat when I dumped it out of the bowl to knead it. That's about 1/2 cup. I had about 3 tablespoons left over. Do not overflour while kneading. Do not overknead.
I did not use a mixer. This was mixed by hand. With my hands. I wonder how it would do as a twisted dough so you didn't have to turn it over yourself. It's a distinct possibility and may be doable with the frozen dough.


So I now have sopas.

Oct 23, 2007

Braise... Recipe Tuesday

Continuing the theme of braising for flavor, I give you....

Braised Shredded Beef

2lb bottom round roast
1 onion, finely chopped
2 stalks celery, finely chopped
2 cloves garlic, crushed or very finely minced
1 cup beer (drink the rest. If it's not drinkable, don't use it)
1/4 c apple cider vinegar
2 T worchestershire sauce
2 T teriyaki sauce (I used store brand)
1/2 tsp yellow mustard (basic yellow, please)
3 T honey
5 c. water
2 T Steak seasoning (I used McCormicks Montreal Steak)
1/2 tsp chili powder
1 tsp Jane's Crazy or other seasoned salt mixture
1 T butter

Mix the teriyaki sauce, worcestershire sauce, honey, vinegar and mustard together in a microwave safe container. Heat for 30 seconds on high, stir, heat 30 more seconds. It should smell like a steak sauce. Set aside.
Preheat the oven to 350 degrees. Season the onion and celery with 1/2 the seasoned salt. Pat the roast dry. Rub the steak seasoning, chili powder and remaining seasoned salt over the beef, all sides.
Melt the butter over medium high heat. You should be using a Dutch oven, oven-safe large casserole dish or a covered stew pot (I'm using the stew pot).
Sear the beef, all sides. Remove the beef to a plate.
Saute the celery and onions over medium heat until translucent, scraping the fond from the bottom of the pan. Add garlic, cook for 1-2 minutes more. Deglaze the pan with the beer, cook down by 1/2. Pour in the teriyaki mix with 5 cups water. Heat to a simmer. Add the beef and any accumulated juices back into the pan. The liquid should just barely cover or almost cover the roast. Add liquid if necessary (beer, water, broth). Bring back to a simmer.
Remove from stovetop to pre-heated oven. Roast for 2 hours. Check the beef. If it doesn't pull apart easily, continue roasting for 30 minutes. Remove from the oven, let it rest uncovered in the pan juices for approximately 15 minutes. Remove meat from pan, refrigerate at least 3 hours or overnight.


Once the beef is cooled down, start shredding. You'll want to remove any residual fat or connective tissue. This means use your nature-provided utensils (hands) and get into it. If you think the shreds are a little too long, cut them. You can use scissors or just cut the roast in 2 or 3 places across the grain.


Once you have your shred, you can freeze it, eat it cold, eat it hot, mix it with sauces, use in place of 'precooked ground beef'... It's very versatile.

To use for barbecue: Re-heat the beef in a saucepan over medium-low heat until it sizzles. Add approximately 1/4 cup barbecue sauce of your choice for each serving. Stir, serve on buns.
To use for burritos or tacos: Re-heat the beef in a saute or frypan over medium-low heat until it sizzles. Add your burrito or taco seasoning according to package directions. If you want to spice it up yourself for burritos (which I frequently do), stir in some chili powder, some chopped onion, some cilantro, some salsa. Stir, serve on tortillas.
To use for soups: Add some to your favorite soup.
To use for sandwich filling: This is a trick from one of my uncles. Saute a handful in a non-stick pan with some garlic and steak seasoning. Stir in a tablespoon of sour cream. Serve on toast. YUM.

Oct 17, 2007

Osso Buco

I freely admit I stole the original recipe from Michael Chu over at Cooking for Engineers. That said, you know me... I never met a recipe I couldn't mess with and this proves to be no different. The changes? I used a blend of beef and chicken broth, crushed bay instead of bay leaf, cab instead of chardonnay, and no gremolata. Yes, you heard me. No gremolata. No parsley in town and I went to 3 grocery stores. I was lucky to find beef shanks. So I improvised. Adapted. Overcame. I used chopped green onion on top. Let's go to the kitchen, shall we? Served with a rice dish (mix), I give you...

Osso Buco
(original recipe available HERE)
4 to 6 beef shanks (all they had, folks. All they had)

4 cups broth (2 chicken, 2 beef, used 1-14oz. can each, plus 2 icecubes of my homemade stock)

12 oz. Cabernet Sauvignon
(I'm using Yellowtail. It's drinkable without being 'foody')
1 white onion (white is a different flavor than yellow)

1 carrot

1 large celery stalk

2 large cloves garlic
2 teaspoons crushed bay

14.5 oz can diced tomatoes

salt, pepper

4 tablespoons butter

Cornstarch slurry IF NEEDED (1 tsp cornstarch, 2 tsp COLD water, stir together, mix into sauce if thickening needed)

chopped green onions for garnish


Special Hardware: Dutch oven or stock pot with lid (can use foil to cover)

PREPARATION:
Dice the onion, celery and carrot. Mince the garlic. Drain the tomatoes. (Fig. 1) Salt and pepper the shanks. Preheat the oven to 350 degrees.


PROCESS:
Melt the 4 tablespoons of butter over low heat. Raise the temp to medium and brown the shanks. DO NOT CROWD YOUR POT. This is a searing step to get some carmelization going on and create some fond in the pot. Crowding produces steam and e
arly stewing. Our goal is to build the flavor. Do not move the meat once it's in the pan. Let it go about 5 minutes per side. Once your shanks are done, remove them to a plate and set them aside. (Fig. 2)
Saute the onions, scraping the fond as you go until the onions are golden.
(Fig. 3)
Add the carrots and celery, cook until the celery is slightly translucent.
(Fig. 4)
Stir in the garlic, cook for a minute or 2 more.

Pour in the wine, increase the heat to medium high. Scrape your fond. Simmer until reduced by 1/2.
Add the tomatoes, broth and bay. Stir and bring back to a simmer.
(Fig. 5)
Add the shanks back in, big side on the bone up so you don't lose the marrow. The liquid should almost cover or just cover the shanks. Bring back to a simmer. (Fig. 6)
Cover, place in the oven and cook for 2 hours.

When it's falling off the bone (and it should be), remove the meat from the pot.
Boil the the liquid in the pot to reduce it to a sauce, using the cornstarch slurry as needed. The sauce should be thick enough to coat the back of a metal spoon.

Place a shank on a plate, scoop some sauce over it, top with green onion (or gremolata if you have it), serve. (Fig. Finish)


NOTES

It's low heat on the butter so you cook away the water in it but still leave the yummy bits.

I use the 2 broth cubes to make up the extra for the full 2 cups.
You could also use some of the juice off the tomatoes if it bothers you.

Oct 11, 2007

You want fries with that?

You ever have a day when you just really don't want to go anywhere or do anything? I'm having that kind of a day. Shakedown is still going on (read that as "I'm still unpacking my kitchen"), there's not much food in the house - we've been frozen food-ing it for the past week or so- and I want something... Not microwaved.

I don't mind microwaving. I like the speed, there's a host of prepared products out there that are quick, easy, at least semi-nutritious, and cheap. But I really am not in the mood for a tv dinner or a burrito or a pot-pie or something like that. And yeah, Lean Cuisine meals DO qualify as a tv dinner to me. You heat it and peel back the top covering for a meal in a tray. That spells tv dinner.

So what to make? The microwave stuff is also usually stove friendly, but that doesn't count. I am just simply not in the mood for that. I want... Oooh... I know. I want fries. French fries, even though they were 'invented' in Belgium. I want hot, steamy fries, all that salty goodness... Most people, at this point, would pack up the car and drive to the local burger shack to get fries that are uniformly cooked to and held at temperatures specified by the shop's local board of health... I'm not most people. I really don't want that. But my freezer does hold a bag of fries (2 lbs for $1.50 at the local grocery) and I have shortening and I have kosher salt.

And I have a day off.

It's pretty basic, folks. Heat oil, insert fries, cook until golden , drain, salt.
First, I'm using frozen. It's what I happen to have on hand. Fresh is best (slice a potato how you like, fry it up), but I'll take frozen today. I use shortening because saturated fats, even saturated fats like vegetable shortening tend to brown things better. If you get the fat hot enough, you don't have to worry about it in moderation. I'm not saying it's good for you, you shouldn't eat fries with every meal, but the equivalent of the size of a small fry made at home will not hurt you on a day off.

Heat the shortening to 350 degrees. I use a saucepan (higher sides) to ease up on any splattering. If I were at my mother's house, I'd pull out her Fry-Daddy, but since I don't have one, I use a standard stainless steel saucepan. Why not non-stick? Metal utensils. I don't have wooden tongs, I don't have a silicone strainer. So I use a stainless pan and metal tongs and all is well in my world.

While the shortening is heating, create a 'drain rig'. This is a half-sheet pan lined with newspaper then paper towelling, then a cooling rack turned upside down. The upside down means the wires are resting directly on the paper. No drippies to clog up your food. This is a tip from Alton, folks, in I'm Just Here For the Food.
And it works. So create your drain rig handy to the melting pot of fat. Get your salt into an easy-to-use container (I recommend a small bowl or similar receptacle. I typically use a little 4 oz. juice glass). When your fat has come up to temperature (350 min., 400 max.), pull the fries out of the freezer, open the bag, grab a handful (my hands are small. I grabbed 10 fries the first pass). Set your handful as gently as you can in the hot fat and stand back. There will be splatters. Cook until golden brown. Remove using tongs or a spider (I have no spider, I used tongs). IMMEDIATELY after removing, put the fries on your drain rig and sprinkle liberally with salt. Turn them over, salt them again. I did 2 handsful. Napkin in the hand, fries in the napkin. YUMMY!French fries

Sep 27, 2007

OOOOh, my my my.... Linked goodness

SO I was watching the Daily Buzz this morning and they had a blurb on Food411.com, a directory of all things food related. It was named by Time in 2005 as one of the 50 coolest websites and it's a welcome addition to my links list (meaning I will soon add it to the right, Dear Reader).

I've actually been thinking about doing Thanksgiving dinner on trenchers this year, mainly 'cause I hate doing dishes (especially for a crowd). Any thoughts on that? Anyone tried it? I'm a former SCA'er, so I've had feasts on them, but how easy is it to do or to fake doing? I'm thinking bread bowls or bread plates. Ideas? It's going to be for anywhere between 4 and 8 people (depending on who comes by), so I'd like to get it planned out beforehand. And I'm looking for ideas.

If you have ideas for me, please comment or email me at darkneuro at gmail dot com.

Oh. Breakfast this morning? Because I'm moving? Hot tea with honey and a microwaved frozen thing. Better than the wheat crackers, ham and potato chips I've survived on (lack of food in apartment I'm moving from) for the past 2 days. Tonight it's spaghetti. YUMYUM.

Happy eating!

Aug 13, 2007

It's been such a LOOONG time...

....since I've posted here in the Kitchen. It's not that I haven't been cooking, I've just been cooking seriously cheap and weird lately. Seriously cheap: Get a package of smoked sausage and a package of red beans and rice. Combine. Seriously cheap: lettuce+raw veg+ sliced meats=chef's salad. Tuna salad... When you use 1 can of tuna (well drained), 1/4 red onion, 4 hard boiled eggs, 3 stalks celery, 1/4 bell pepper, 4 tablespoons relish, 4 tablespoons mayo, it's weird and crunchy and not really 'tuna salad'....

So as you see, Dear Reader, it's been cheap and weird. So I thought, in the interest of keeping this place alive, I'd share some of my favorite food and recipe links and maybe YOU will be inspired to cook something. Wait for next week. I've got some ideas. Please be aware, this could be considered food porn.

I've talked a bit here in Oak Ridge about not having "my" Mexican places to eat at. Here's recipes from one of them, Garduno's Restaurants, in Albuquerque. They've got up their recipe for Roasted Red Chile Salsa. YUM YUM. Along the same lines is this offering from PNM, the Public Service Co. of NM, their Cocinas de New Mexico cookbook. Tacos, posole, refritos, empanaditas fritas, sopas and Navajo Fry Bread, they have it all. GREAT traditional recipes.

Here's a great resource from Figleaf: The World's Healthiest Foods. Interesting reference site geared (as the title suggests) to healthy food. Another great reference site if you like cheese (and I do) is the Wisconsin Cheese and Dairy board. They've got a bunch of free things you can get, including a 'cheese chart' (reminds me I need to get another one, actually), and downloadable files as well. A great chile site is Dave's Fiery Foods. He runs the Fiery Foods Show that goes between Albuquerque and Vegas.

Here is a place with just about every cuisine known in Asia: AsiaRecipe.com. Warning: Heavy popups. It's got Philipino, Japanese, Chinese, Thai... Go play, but turn on your pop-up blocker.

These are some sites I've been perusing lately: Stephen Cooks, One Hot Stove, and Live to Eat. Interesting, but I've been strapped for time and such and can't make some of the beautiful recipes they have.

Desserts are best (in my opinon) purchased, and who better for chocolate than Jacques Torres? I can vouch for the quality of the product. I can vouch for the incredibly fast shipping. This man should be given a medal.

This next site... Whatever you think of the woman, the court case, the jail time, the magazine, the tv shows... Martha Stewart has some excellent recipes. And let's not forget Food TV, Emeril's (even if you think he's a tool) and Williams-Sonoma. Ideas, people. Utilize them for IDEAS....

So happy eating, and I'll see you next week!

Jul 1, 2007

Master Recipe: Beef with Rice... Recipe Tuesday (!)

I'm really kindof excited about this one. This, I believe, qualifies as a Master Recipe, meaning it's good on it's own and it can also be used as a base for (at the very least) a few other recipes I've managed to think up (and have tried 1)....
SO, let's go into The Kitchen™ and see what we can make, shall we?

Beef with Rice (Makes 1 Master Recipe)
1 pound ground beef (I got a chuck, 80/20 blend)
1/2 large yellow onion chopped fine
1/2 bell pepper chopped fine
2 T. grill seasoning (I use Montreal flavor grill seasoning by McCormick)
2 T. worcestershire sauce
15 1/2 oz. beef broth
1 cup basmati or Texmati rice

Brown the beef and onion over medium heat until the beef is just barely cooked and the onions are translucent. Drain as much fat out of the pan as you can. Throw in the grill seasoning, the bell pepper and the worcestershire sauce. Stir and cook for approximately 3 minutes or until the bell pepper is just starting to show a softening. Stir in the beef broth. Bring to a boil. Stir in the rice, drop the heat to low/med low and set a timer for 15 minutes.
Remove from heat, stir to combine.

There you go. Easy, cheap and boy-oh-boy, was it GOOD. I served it to myself in a bowl while I was reading. It was really a quick and dirty "What's in the house to eat?" meal. But in thinking about it later, I realized I had made somewhat of a Master Recipe, something that could be combined with just a few other ingredients to make... well, just about anything.

Variations:
1. Take the finished meat, sprinkle it with chili powder, layer it with Velveeta(tm) cheese and tortilla chips in a casserole dish, broil for approximately 2 minutes. Serve with salsa, sour cream, lettuce and tomato (Nachos!-Made this. Thumbs up from Sic_un, too)
2. Take the finished meat, mix in 1 8oz. can of tomato sauce and 2 teaspoons chili powder (and yes, I mean the mixed powder), stir until thick. Load it up in burritos and/or tacos (Tacos! Burritos!)
3. Take the finished meat, mix in 1 20oz. can of chopped tomato with basil. Throw in some seasonings (oregano, thyme, marjoram, 2 or 3 finely diced cloves of garlic), simmer over med low heat for about an hour or so (Pasta Sauce!)
4. In a bowl, shred 1 carrot and chop 1 stalk of celery fine. Microwave it with about 1/4 teaspoon water for about 2 minutes or until hot. Mix it with the meat mixture, roll into egg roll skins. Fry until brown (Lumpia!... or at least as Lumpia like my mom makes)
5. Stir in another can of broth (or carton... use what you like. Make your own. call it 2 cups for luck). Simmer for about 30 minutes, throwing in a bag of frozen mixed veg (broccoli, carrots, beans) for good measure. (Soup!)

There. Master Recipe. What can YOU come up as a variation?

Jun 5, 2007

Not Yer Mamma's Beef and Noodles

So how difficult can beef and noodles be to make? They're not. How good are beef and noodles, typically? How.. blah, really. And it usually contains mushrooms, which Sic_un cannot eat. So looking into the freezer and the pantry and what we have to eat and all that, I decided I'd make some beef and noodles, but a tomato based dish, not a cream based dish.

Oh. Wait. I'm adding sour cream to mine, it'll be creamy. But not cooked cream based. You'll see.

Not Yer Mamma's: Beef and Noodles

1/2 pound beef (ground is fine, thinly sliced chuck is fine, you only need 1/2 a pound)
2 tablespoons Italian herb seasoning (should contain some thyme, oregano, basil and garlic)
1 tablespoon worcestershire sauce
1 teaspoon olive oil
1 8 oz. can tomato sauce
1 14 oz. can petite diced tomatoes with onion
1/2 onion, chopped to about 1/4-1/2 inch pieces
2 cloves garlic, crushed or minced fine
1/2 teaspoon 'seasoning salt' (I used Morton)
1/2 pound wide egg noodles

Pack the herbs around the meat, sprinkle with the worcestershire sauce and bag it up and chill it for at least 8 hours. -I popped mine in the fridge this morning, it's ready to go after work.
Heat the olive oil in a saute pan over medium heat until shimmery. Put in the onion and garlic, cook while stirring for 1 minute or so, until slightly softened. Throw in the meat, breaking it up into small pieces as you go (if using ground). Cook over medium heat until barely browned. Add the tomato sauce and diced tomato, stirring it in.
PLAY WITH YOUR SPICES. I used the Morton, a bit of pepper and slapped up some other herbs into it. This is by your taste buds, not mine.
Start the noodles, should take about 8-10 minutes to cook.
While the noodles are going, you're going to be reducing the sauce until the majority of the liquid is gone.
Once the noodles are done, drain them, mix the 2 pans together in the noodle pan and you're done.

This recipe took me about 30 minutes to make. There's a lot of down time where you can throw together a salad and maybe heat some biscuits if you want... A good bruschetta would be good here, as would a starting wine and cheese course. It's good stuff. I spiced mine up a bit, and added the sour cream to do the creamy. 2 Tablespoons of sour cream, mix it in the bowl.

May 29, 2007

Cinnamon roll failure... Recipe Tuesday

We arranged for a pot luck at work. I said I'd make caramel sticky buns, those upside down delights of my mother's that I adored. I had all the ingredients, I had a reasonable recipe...

Or so I thought.

I followed the recipe, only made 1 very small change. I put some allspice in the general dough. That's the ONLY change I made.

After the 20 minutes baking time specified, I had grey rocks. No golden anywhere. So I left them in a little bit longer, about 7 minutes. Took them out. The caramel at the bottom had burnt, but the middle of the rolls were still completely raw. The top (browning) side of them was hard as a rock, no give anywhere.

This recipe failed spectacularly. I had fresh yeast, it raised perfectly, the dough sampled good, it was kneaded and shaped properly, it was a good, soft, elastic dough with a lot of gluten developed. It failed spectacularly.

i wouldn't serve the finished product to a goat.

Someone. Anyone. COME TO OAK RIDGE AND TEACH ME HOW TO FUCKING BAKE SOMETHING OTHER THAN COOKIES.

May 14, 2007

Bread, Pt. 2

No pictures today, but I'll edit and get them in here.

Basically, when last we left the bread, the sourdough starter had 'started' and was bubbling nicely along. It is still alive, is in my refrigerator and I've played with it.

Reserve at least a cup of the starter and keep feeding it on the 1/2 cup flour, 1/4 cup water schedule as necessary. You can also pop it in the fridge, take it out and feed it once a week.

Original recipe:
After you go through the starter process, you take 2 cups of starter and mix in 3-4 cups of bread flour and 1/2 cup warm water. Mix it in well, cover and rise until doubled. When dough has risen, punch down, add 1/2 cup flour, knead until smooth. Dough will be sticky. Shape into loaves, let rise until double, bake 30 minutes at 350 degrees or until golden and 'hollow' sounding.

MY RECIPE:
Take 2 cups starter, mix in 2 cups flour and 1/4 cup warm water. Let rise until double. Punch down, mix in 2 cups flour and 1/4 cup warm water. Let rise until double. Punch down, mix in enough flour that the dough is smooth and not-so-sticky. Form into loaves, let rise until double. Bake 30 minutes or until golden brown. Thunk the loaf. Does it sound hollow? It's done. Remove it to a rack to cool for approximately 1 hour.

May 1, 2007

Bread. Recipe Tuesday

I've always been fascinated by bread and bread making. Not because I have any great aptitude for it, but to take things that will, under certain circumstances make glue, and use them to make bread, well, it's just fascinating to me. Mom makes her own bread here and there, both the 'old fashioned way' by hand and all the risings, and the 'machine'. She has a bread machine and for awhile there, we ate nothing but bread machine bread. I didn't like the loaves it turned out. It had a round barrel shaped baking unit and the loaves were columns.

But she also made bread by hand too, and I always liked watching her make bread. It was the motions, the concentration into kneading it so the glutens properly stretched. She showed me the web that they form, explained the science behind it to me, although she's not a scientist by trade, and certainly only a 'sometimes' bread baker.

And I've been fascinated as well. My forays into anything except quick breads usually end in disaster. White soda bread is beyond me, for example. Imagine a 12" round hockey puck. It was seriously hard. But yeast breads... All the action is by yeasts, single celled organisms that produce gas which raises bread and the gluten web holds that gas in place creating a soft interior for a loaf, no matter how it may be shaped. People have been baking bread for centuries, I reasoned. There's no reason why I shouldn't be able to bake bread.

I told myself, "So let's do something that you've heard about all your life, your mom didn't necessarily like it, but did it anyway, just to say she did. People with no cooking experience beyond being able to feed themselves in the meanest of ways did this. You can do this.

"You can make sourdough." (is that crickets I hear in the background, Dear Reader?)

I turned to the Joy of Cooking, which I'm lucky enough to have on a computer disc and therefore don't have to decide to lug around the huge tome it is. There is a wealth of information in it. If you are close friends with someone who cooks who doesn't have a copy, remember this when it's time for birthdays or anniversaries or one of those myriad gift-giving holidays where you're supposed to wrack your brain for weeks to come up with the perfect gift and are always afraid you've missed the mark completely. If you have a friend who cooks and you know they don't have a copy, get them one.

Here's Sourdough Starter, the Joy of Cooking way (and bastardized by me, which is something I do and you all know it)

In a small clean mixing bowl, mix 1/2 cup sifted bread flour and 1/4 cup barely warm water (80 degrees). Knead it until it's elastic, put it back in the bowl and cover with plastic wrap. Poke holes in the wrap, let it sit in a dark, cool area for 12-15 hours. Mix in 1/2 cup sifted bread flour and 1/4 cup barely warm water. Cover, let sit for 12-15 hours.

Move it to a larger bowl. Continue feeding it with 1/2 cup flour, 1/4 cup water. Recover the bowl and let it sit for 24 hours. If you don't see some bubbling action going on after 24 hours, throw it out and start over. If it has started bubbling and rising, mix in 1/2 cup flour and 1/4 cup water.

Cover it, but don't poke holes in it. Let it rest for 12 hours. If there are bubbles all over, add in 1/2 cup flour and 1/4 cup water. Let it sit for 4-8 hours. It should have a sour tang and bubbles all over. You can make bread with it now. If not, continue on the 1/2 and 1/4 feeding schedule until you can use it.


The bastard version is mine. I'm using a mason jar instead of a bowl and regular flour. I figure if it was good enough for the original Sourdoughs, it's good enough for me.
Here it is after the first feeding.


After the third feeding (right before you leave it covered for 24 hours).


Checking it when I got home today. I think we've got bubbles (DUH!) and there is a SMIDGE of a sourness to it. Further deponent sayeth not. We will explore this bread experiment further next week. It lowered in volume, so I feed it when I get home from here at Sic_un's, then form loaves and such tomorrow morning.

So because this is taking some time to get the 'wild yeast' going, getting the SOUR of Sourdough going, I decided to do a comparison of a 'regular' bread using commercial yeast.

This is straight from Joy, no edits. Notes are at the end:

Quick Rising White Bread
1 pkg active dry yeast
1/4 cup warm (105-115 degree) water
Dissolve the yeast in the warm water in a large mixing bowl.


To this mixture, add:
3 cups bread flour
2 cups warm water
1 tablespoon melted butter
2 tablespoons sugar
1 tablespoon salt
Mix by hand or on low speed for 1 minute.


Add 3 to 3 1/2 cups bread flour a 1/2 cup at a time until dough is moist but not sticky.


Knead for about 10 minutes or with a mixer dough hook on low to medium until the dough is smooth and elastic.


Transfer the dough to an oiled bown and turn it over once to cover with oil. Cover loosely with plastic wrap and let rise in a warm place until doubled in volume, 1 to 1/2 hours.


Grease 2 loaf pans. Punch the dough down, divide it in half and form 2 loaves. Place seam side down in the pans. Cover loosely with plastic wrap and let rise in a warm place until doubled in volume, 1 to 1/2 hours.


While it's rising, preheat oven to 450 degrees. When the dough has doubled, bake the loaves at 450 for 10 minutes, then reduce heat to 350 and bake until the bottoms of the loaves sound hollow when tapped, about 30 minutes more. Remove the loaves from the pans to a rack to cool.


NOTES ON QUICK RISING WHITE BREAD:
It's not quick. Sorry... It took 3 hours rise time. That isn't quick. It took 1 hour and 45 minutes bake time (even pulling the pan off the loaf to knock the bottom of it!). It's quicker than the other recipes they have, which all seem to include raising the dough in the refrigerator, but it's not 'quick'. Not by my definition of 'quick'. HOWEVER... It is quicker than the other recipes.
I ended up getting that last 3 cups of flour in by kneading it in until smooth. I like kneading.
It's got a crunchy crust, leading me to believe I should have baked it as a 'free form' loaf instead of in a pan.

ANY TIPS OR HINTS OR ASSISTANCE IN MAKING YEAST AND SOURDOUGH BREAD IS HOLLERED FOR!!!
Enjoy, Dear Reader.

Apr 23, 2007

Bonding with Stock... Recipe Tuesday

Karl Elvis mentioned making stock. And I like making stock. It's a great base, and when you make it yourself, you know just what went into it so you've got control over the flavors that are or aren't added. There's nothing I just plain dislike as much as I dislike using a mediocre stock. Unfortunately, most canned stocks are just that, so I'm going to be making stock next week.

Here's the recipe I'm going to be using

Basic Beef Stock

5 pounds bare rendering bones, sawed into 2" pieces (you can also use bones from steaks or trimmings from roasts, whatever you happen to have. You can request bones from the butcher at your local friendly butcher shop [we've got one in town], or just ask at the local grocery. They should be cheap)
1 pound carrots, rough chopped into 1/2" pieces
3 yellow onions, rough chopped
1 pound celery, rough chopped

Roast your bones. Now, no bad jokes. Set the oven to 400, place the bones down on a pan that you've put foil into, roast them until they're toasted brown, but not black. Should take about 1/2 an hour to 1 hour, and you flip it while roasting so you get a good overall color.
Put the roasted bones into the bottom of a big soup or stock pot. Cover with enough water so the bones are completely submerged by at least an inch. Bring to a boil. Skim the foam. Drop the heat to medium, throw in the veggies. Let this simmer for at least 6 hours, with 12 hours being preferred.
If you've got a crock pot, put the bones in the bottom of the crock pot, add water to cover. Set to 'High' for 1 hour. At the end of 1 hour, skim any foam, pour in the veggies and fill the pot with water. Set it on 'Low' and let it go for a full 24 hours.
At the end of the cook time, let it cool. Float some bags of ice in it, or set it into an ice chest filled with ice. Don't just set it in the fridge, you'll heat everything in there up. Get it cooled down* your favorite way. Strain it.
When you're done cooling and straining, put it into freezer containers, ice cube trays (2 or 3 stock cubes and I say you have a pan sauce!) bags, whatever you need to do. It'll keep in the freezer for 6 months, and it's a heck of a lot cheaper than buying stock.
You can also do a bit of what I've been known to do. I'll boil down the stock with the veggies in it for a good long while, get it really concentrated. Strain and freeze above, but it's super-concentrated. Then you just have to pull out an ice cube of it, add 2 cups of water and voila! Stock that doesn't take up nearly as much freezer room.

*Just as an aside, I have been thinking of this. The little hand-held blenders have taken off like hotcakes. They should make a 'cooler' about that same size, with a refrigerated coil encased in something that's foodsafe. Easy cool down for leftovers and soups and such. Someone should get on that. There. A free invention for someone.

Apr 17, 2007

Variations on a theme... Recipe Tuesday

One of the things I've insisted on, Dear Reader, is that people play with their food. Don't accept a recipe as written just because that's the way you've always done it, don't do it the way your mom always did it because... well, tradition, things like that. New cooking methods, new spices, new ways of looking at things. Try something new.

So today's variation is variations on the theme of a Tennessee phenomenon called Sausage Balls that my grandmother morphed into her breakfast-y Sausage Biscuits. The recipes are alike enough that it makes it easy to set them together. First, the basics...

Basic Sausage Biscuits (Sausage balls ingredients are parenthetical)
1 pound sausage (1 lb sausage)
10 oz. shredded cheese (8 oz. shredded cheese)
2 1/4 cups Bisquick (2 cups Bisquick)
water to moisten (LEAVE THIS OUT)

Heat oven to 350. For biscuits, form into golf ball sized balls, flatten slightly. Cook for 18-20 minutes or until golden brown. For balls, form into small walnut sized balls, do not flatten. Cook for 15-18 minutes or until golden brown.

Here's the variation we tried:
Biscuits= Italian sausage + Longhorn style cheddar
I won't recommend this. I got 3 dozen biscuits, they're all eaten (Sic_un and his roommate, mostly), but they didn't taste quite right to me. Here's the variations I've come up with:

Biscuits=mild breakfast sausage+mild cheddar cheese (serve with syrup &/or jam for breakfast)
Biscuits=hot breakfast sausage+sharp cheddar cheese (see above, more savory)
Balls=Italian sausage+blended Italian mix cheeses (savory, serve with a marinara as appetizer)
Balls=Chorizo+blend of manchego and cheddar (savory, serve with queso for a Mexican appetizer)

So, Dear Reader, the moral to this Recipe Tuesday is simply this:

PLAY WITH YOUR FOOD!

Apr 10, 2007

Corned beef ... Recipe Tuesday

Right now, Dear Reader, I have a pot full o'goodness bubbling away on the stove. We've passed St Patrick's Day by 3 weeks or so and casting about for something to eat led Sic_un to say "You still have some corned beef in the freezer. Make it up. We'll have sandwiches".
So I have corned beef bubbling on the stove. Here's how I do it for sandwiches, which is a little different from how I do it for corned beef and cabbage:

Corned Beef for Sandwiches
1 beef brisket (for St. Pat's, I didn't want a huge amount of leftovers, so I got a 3 lb brisket and cut away about 1 1/2 lbs. SO I'm using about 1 1/2 pounds)
2 teaspoons mustard seed-lightly crushed
1/2 sweet white onion, finely chopped
1 1/2 teaspoons caraway seeds-lightly crushed
1 teaspoon each dried basil and rosemary
1 bay leaf (leave it in the broth)
2 teaspoons fresh ground black pepper
water to cover

In the bottom of a large saucepan or soup pot (whatever the brisket will fit into, remember: You can cut it to fit), saute the onion and spices over medium heat until the onion is transparent. Mine took me about 3 or 4 minutes. Once the onion is transparent, put the beef on top of it, fat side down. Let it sizzle and render some of the fat off for about 3 minutes. Turn it over, let it go another 3 minutes. Fill the pot with enough water to cover the brisket. Bring just to a boil, reduce heat and simmer for 45 minutes.
Turn off the heat and let it rest in the broth for about 15 minutes.
Remove from broth, let rest 5 minutes.
Slice thin, make sandwiches.

The difference between this for sammies and this for c.b.&c is that I use less mustard and caraway, but add in thyme. Then, after simmering and getting all happy in the broth, I'll throw in potatoes (peeled and chunked) for about 30 minutes and cabbage wedges for about 15 minutes (take a head of cabbage, slice it into wedges lengthwise--I can get up to 16 out of a head) and that's corned beef and cabbage. Less spicy, since the meat has to do less.

For sandwiches, we're using cheddar cheese, white bread, mayo, mustard (dijon), lettuce and tomato (yeah, we're weird, we'll cop to that).

Enjoy!

Apr 2, 2007

Shish! Kabob, that is... Recipe Tuesday

So spring has sprung. Sic_un just mowed the lawn for the first time, we've been doing some grilling (on the OH SO INADEQUATE grill he owns), and I figured...

Let's do Kabobs. They're quick, easy, beef so Sic_un can eat it, opens to a huge amount of flavor possibilities... Quick, easy, etc...

Beef Kabob

1 1/2 punds London Broil, approx. 1" thick, cut into 1 to 1 1/2" cubes
1 large sweet onion
1 large green bell pepper
4 tablespoons prepared teriyaki sauce
4 tablespoons worcestershire sauce
2 tablespoons barbecue sauce
3 tablespoons honey
1 tablespoon basalmic vinegar
1 teaspoon dried rosemary (crushed)
1 teaspoon dried marjoram (crushed)
1" grated or sliced fresh ginger (I keep my ginger in the freezer. When I need some, I can peel it really quickly with my veggie knife, then slice off shavings of it that will melt into the marinades)

Mix the teriyaki, worcestershire, barbecue, honey, basalmic vinegar, rosemary, marjoram and ginger until well blended. You can heat it in the microwave for up to 30 seconds to melt the honey if you need to. Place the marinade and the meat into a ziplock bag, refrigerate overnight.

When you're ready to grill, thread meat, pieces of onion and slices of bell pepper onto skewers. If you use wooden or bamboo skewers, please soak them thoroughly in water before using.
Grill until they're done to your point of done-ness. I like things medium to medium-rare, Sic_un likes well. Grill until they're done to your point of done-ness.
Served with grilled pineapple rings and green salad. Great for a quick, easy, no thought quiet Sunday, you know?
Have a good week, Dear Reader.

Mar 27, 2007

Because.... Cherry-O Pie :Recipe Tuesday

Because I'm thinking of Mom and this is close enough....

Cherry-O Pie
1 graham cracker pie crust
8 oz. cream cheese
1 can sweetened condensed milk
1/2 cup lemon juice
1 cap almond extract
1 can cherry pie filling, chilled
Instructions:
In a mixing bowl, mix cream cheese, milk, lemon juice, and extract until well blended and smooth.
Pour cream mixture into pie crust and smooth top.
Chill overnight in the refrigerator.
Top with cherry pie filling before serving.

Mar 20, 2007

Irish? Why yes... Yes I am...

But I cannot, for some reason, make bread.
This week's Recipe Tuesday comes to you from Food TV, where I got what seemed to be a decent recipe for Soda Bread. Go here for the recipe.
Now, what I ended up with isn't a chewy, earthy bread good for corned beef and cabbage and potatoes. That's what it should have been.

I didn't use enough liquid.
I ended up with a large hockey puck that had a dry, icky texture.
If anyone can make bread, teach me.
Happy Recipe Tuesday, folks

Mar 6, 2007

SOPA!!!

Once again, Dear Reader, it's time for Recipe Tuesday. Slight disclaimer: I'm cooking these when I get home tonight, I'll update and let you know how they turn out Tuesday evening (posting from work, no internet at home, Sic_un's getting his sissy bar installed tonight).

I've been craving Sopas... Sopapillas. A delicious light, airy fried bread prevalent (very) in every Mexican restaurant in New Mexico. People here haven't HEARD of them... Why, you may ask. I asked that too. Nobody here could tell me.

So you go to the internet and what can you find? THIS. Apparently, according to Wikipedia (and, really, this is the best explanation I can find), sopapillas were developed or created or whatever in the late 1800's... IN NEW MEXICO. There is a South American dish called torta frita that is quite a bit like it, but apparently sopas are a New Mexican phenom. Even the language kindof carries this through. The etymology: American Spanish, diminutive of Spanish sopaipa, fried dough sweetened with honey, from earlier xopaipa, from Mozarabic xupaipa. Also diminutive of Ăşppa, sĂşppa, bread soaked in oil, from Old Spanish sopa, food soaked in liquid, of Germanic origin.

And I've been craving.

Shall we go to the kitchen, Dear Reader?

Sopapillas (service for 6)


1 cup all-purpose flour
1/2 teaspoon baking powder
1/4 teaspoon salt
1 tablespoon shortening
1/4 cup and 2 tablespoons warm water
2 cups oil for frying --USE SHORTENING... Fries up better.

In a large bowl, stir together flour, baking powder, salt and shortening. Stir in water; mix until dough is smooth. Cover and let stand for 20 minutes.
Roll out on floured board until 1/8 to 1/4 inch thick. Cut into 3 inch squares. Heat oil in deep-fryer to 375 degrees F (190 degrees C). Fry until golden brown on both sides. Drain on paper towels and serve hot. You may dust with powdered sugar, serve with honey, or stuff with whatever you desire.

Easy recipe. Please note, you can get more servings if you double/triple, etc. I don't see ANY problem with expanding this recipe. BUT... Sopas don't store so well, they don't reheat so well. You're better off keeping the batches smaller to fit how many you want to feed at any one time.
You MUST roll them really thin otherwise they don't puff the way they should (thick dough=thick sopa...icky). I've often heard they should be tissue paper thin. Don't need to go that thin, but it does puff up better the thinner it is.
Use shortening for frying. Oil doesn't give quite as good a browning from what I've seen in the past. I prefer to deep fry with shortening.
My favorite way to enjoy them is to either have them with enchiladas (gooey and dripping with chile verde over at Los Cuates) or as dessert drizzled with honey. The salt in them (and it really is a bit of a savory dough) contrasts nicely and makes it a 'not heavy' dessert.
Enjoy, and I'll let you know how it turns out tomorrow afternoon or evening. Maybe even with pictures :)

The Its-Been-a-Hell-of-a-Week Quiche

Hi, I'm SiO2. I've commented some here and I post Recipe Tuesday stuff in that Other journaling site, but the food's good so at Neuro's request I'll be cross posting here and there and I also ended up with my own blog(I'll link if I do anything with it). I'm sure that's mostly a sentence.

Its Recipe Tuesday and after the week or so that it has been, Dear Reader (rough and not in that warm squishy way), I figure I'll make comfort food this week.

This is the sort of about right style my dad taught me to cook in (think of measuring a teaspoon in of salt into your cupped palm and knowing its about right). I have no idea what dad calls this, but its thing he made for dinner when the day had been long or awful.

OK pick up a zucchini: wash and shred it

Take a glass baking pan and grease or spray it. Then line it with the zucchini shreds and press them into place. Bake 350 that til a little crispy. After you pull that out of the oven turn it up to 400 to preheat.

Take enough eggs (5ish - it depends upon your pan) and milk and cheese to fill this and beat them and pour it in to the crust, plus or minus spicing but really I like it mostly plain. Fresh sage could go well.

Place mixture in the crust then cover with red chile sauce, which is buy red chile add water and simmer till gooey.

Bake at 400 or so for 30-45 or til golden brown and solid.

I always think this is fabulous in its balance: spicy and plain, crunchy and soft. Sorry no pictures.

Feb 27, 2007

Pizza pizza..

First, I'm late off work tonight, so I'm posting this from work. There will be no pictures. Sorry. Like I said, I'm late off work, and rather than go up and only spend 2-3 hours with Sic_un, I'm 'staying home'. Since I have no intarweb, it must be done here. No pictures because well, it's work. I can get fired for plugging things into the computers here.

Sic_un and I have been tossing around dinner ideas, who cooks, etc etc etc. Yesterday, we decided 'Fuck it, we'll make pizza'. That's this week's Recipe Tuesday


PIZZA PIZZA
1 pizza crust (you can use Boboli, pre-cooked crusts, frozen crusts, refrigerator crusts [this is what we did], or make your own. I didn't want the mess so we used refrigerator crusts. I've also used standard french bread loaves sliced in 1/2)
Pizza Sauce (jarred sauces are fine--We used the Ragu Pizza sauce. It has no added sugar((!)) and it's not overpoweringly sweet-Look into white sauces, pestos, make your own)
Italian sausage-Brown before hand
ham slices
Pepperoni
Mushrooms
Sliced bell peppers
Jalapenos
Sliced red onion
Cheese (we used pre-shredded 'italian' blend from Sargento...It was on sale and the same price a standard 3 cheese blend would be, so we used the 6 cheese blend from Sargento)

Start with crust preparation. If you want to make your own crust, check Food Network or Recipe Source for recipes. Follow the directions. Next time, we're talking about making our own crusts. The Pillsbury refrigerator crust is OK flavor-wise, a little tough texture-wise, and it winds up as a 'thin' crust. I don't like 'thin' crusts in general, so I wasn't super happy with it, but it was OK.
Once the crust is prepped (my instructions were bake it 8 minutes, then top it and bake it 9-11 minutes more), top.
Start with the sauce. Don't load it down too much with sauce because it will make the crust soggy after baking.
Drain all meats and veggies. This makes it less likely to drip and get wierd.
Layer on your toppings. I started with a little cheese in the sauce, then meats, then more cheese, then veggies then more cheese.
Sic_un did sauce, meat, veggies, cheese.
Bake it to bubble the cheese. If the crust appears to be getting too dark, feel free to cover the edges with foil and stick it under the broiler to get a bubbly hot top.

So we had pizza for dinner and were curious... Has anyone else ended up making pizza and getting more than satisfied with 1 or 2 pieces? We order a pizza and I can scarf down a full 4 slices if I'm determined to. I could barely finish 1 piece of the homemade, it was that filling. Any clue? I mean, I know amount of topping has a lot to do with it, and I packed a huge amount of toppings on, but Sic_un was only able to finish 2 pieces of his and he was full too. Anybody else experience this?

***
The birthday was great! I had a ball! We're actually talking about going bowling now. I bowled an 86 the first game and a 74 the second game (last drunken bowling I made a 13? 15? Something like that. It's an improvement!). We're not too concerned with scoring, it's just... Is it fun? Yes. Did we HAVE fun? Yes. Was it different? Yes. SO we'll probably go again.
Peace, Dear Reader.

Saturday Night Let-It-Sit Stew...

Greetings, Dear Reader. I was really in a quandry about what to post for Recipe Tuesday. See, I made stew Saturday, then Sic_un made roast for Sunday, and I really didn't feel like cooking tonight. SO what to do for Recipe Tuesday... It's, well, it's stew or roast or an untried recipe.

Then I thought about how I ended up making the stew. New cooking trick for me, so...

Saturday Night Let-It-Sit Stew

1 1/2 pound chuck roast, cut into 1 1/2x1 inch chunks
3/4 cup flour
3 tablespoons McCormick Montreal Steak Seasoning
1/2 onion, coarsely chopped (1/2" pieces)
1 tablespoon oil
***
1 1/2 onions, medium chop (1/4" pieces)
4 carrots, sliced into 1/2" thick pieces
3 stalks celery, chopped into 1/4" pieces
3 tablespoons worcestershire sauce
***
5 cups beef broth
1 can navy beans, rinsed well
4 potatoes, cut into large bite size chunks (I ended up cutting them in 1/2 lengthwise, then 3/4 inch chunks)
2 cups frozen green beans

To start the stew, mix your seasoning into your flour. Coat the beef chunks with the flour. Heat the oil in the bottom of a large soup or stock pot over medium-high heat until shimmery. Sear the meat chunks in batches with small amounts of the coarsely chopped onion, removing each batch to a plate to catch the juices. You will not be cooking the meat through, just searing it for color and texture. Be sure to drain as much of the oil off the pieces and leave it in the pan.

After searing the meat, throw the onions, carrots and celery into the pan. After approximately 5-7 minutes of cooking (you want the veggies barely softened), sprinkle approximately 3 tablespoons of your coating flour over the top of the veggies, stir well. We're cooking the flour rather than cooking the veggies as much. Keep stirring. Once the flour reaches a nice golden color, stir in the reserved beef, the worcestershire sauce and the 5 cups of beef broth. You should notice it getting thicker once it gets to the bubble point. At this point, turn it down and let it simmer for about 1/2 an hour. Taste it for seasonings, add to your heart's content. I threw in about 1 teaspoon of Jane's Crazy Pepper, which gave it an immediate bite and flavor boost without a whole lot of 'hot'.

After it's simmered for a 1/2 hour or so, add in your beans and potatoes. Add water to cover veggies if necessary. Bring it to a bubble. Simmer it on medium heat, at a bubble, stirring occasionally. After a half hour, turn it off. Yeah, yeah, I know. "Don't keep food in the 'danger zone'". We went to G&D's to pick up equipment and kick back for a few. It ended up being 2 hours. But that 2 hours? The pot held the heat really well, the stew held it's temperature really well, and the flavors just BLENDED. You could stop at this point, pour it into a bowl and let it refrigerate overnight, but let it REST.

When we came back home, we popped the heat back up, brought it to a boil, turned it down to simmer, threw in the green beans, and let it just bubble at a lower heat for about 1 1/2 hours.

Serve with the bread and salad of your choice.

It really is a stew, thick and rich and peppery. We had about 6-8 servings left over that we froze for future 'Don't wanna cook' nights. You can thin it down with broth or water, add in more veggies (how good would corn be in this?), add some tomato (we didn't want the acid in it), throw in some V8.... Play with it, but as is, it's a very thick and rich hearty stew OH so good for days that start out like this:
Enjoy Recipe Tuesday, folks! Changes to it are on the way, including adding in SiO2's recipes :)

Better late than never....

Greetings, Dear Reader. Welcome once again to the latest rendition of Recipe Tuesday. This week, I've done sort of an Outward Bound! type thing... I'm cooking over at Sic_un's, I've brought my glass bowls, all ingredients, my spat, my grater... I've used his muffin tins (he has them! I don't. Hm. This says something, but I'm not quite sure what), his measuring cups and his teaspoon measure. And his stove. You get the picture.

Speaking of pictures, no pictures. I still need to actually BUY the batteries at the STORE when I'm there instead of wanting to get in and out as fast as possible. This Recipe Tuesday is because we're having 'treat day' for Valentine's at work. Our team is, at any rate. We're exchanging valentines and having sweet stuff. Hey, gets me off the phones, right? I still think it's rather... Third grade-ish, but that's me. As I said, I get off the phones. Without further ado...


UltraOrange Cupcakes with CreamCheese Frosting

Make your cupcakes according to directions HERE.
At the point where you would fill the cake pan, fill paper-lined muffin cups 2/3 full of batter. Bake them at 350 degrees for 20-25 minutes or until you get a clean toothpick test. I wound up with 22 cupcakes out of 1 batch, and most were a very scant 2/3 cup. So make your cupcakes.
COOL THEM THOROUGHLY.

While your cupcakes are baking, you can mix the frosting:
8 oz. Cream Cheese-CHILLED
5 tablespoons unsalted butter, softened
2 teaspoons vanilla
1 tablespoon orange zest
1 tablespoon orange juice
2 to 2 1/2 cups powdered sugar

In a medium bowl, beat everything except the powdered sugar until blended. Add the powdered sugar 1/3 to 1/2 cup at a time, blending until smooth and your desired consistency. If the frosting gets too stiff, keep beating a few seconds until it thins. Do not overbeat.

Frost your cupcakes, cupcake!


Notes: Apparently, if the cream cheese is chilled and the butter soft, it won't get grainy. So that's how I did it. What I did with the orange juice is used the juice of 1 small orange in the frosting and regular bottled orange juice (non-concentrate, pulp free) for the cake. I managed to get just 2 tablespoons of zest out of it using a fine grater.

Shepherd's Pie...

Greetings once again, Dear Reader. As promised, it's Shepherd's Pie for Recipe Tuesday, sans pictures not because I'm lazy but because my rechargeables for the camera need replaced. They'll hold a very short charge is all. SIGH. Anyway, Sic_un and I were watching Rachael Ray cook one evening and said 'That would be good!'... She was making a turkey based pie. Gave me the idea, anyway, so we made it up over the weekend. Let's go to the kitchen, shall we?

Shepherd's Pie


1 to 1 1/2 pounds ground beef (try for the 85/15 mix)
1 medium onion, chopped 1/4 inch
3 medium carrots, peeled and sliced 1/8 inch crosswise
2 stalks celery, chopped 1/4 inch
3 tablespoons flour
1 cup beef broth
1 bell pepper, chopped 1/4 inch
2 teaspoons Seasoning (Your favorite steak seasoning, seasoning salt, I used Jane's Crazy Salt and Pepper blends), separated
3 cups mashed potatoes (make your own, use leftovers, use a box... 3 cups mashed potatoes. I RECOMMEND USING HOT MASHED POTATOES, EVEN IF YOU HAVE TO MICROWAVE THEM HOT)

Heat a 12", ovenproof skillet over medium heat. Begin browning the ground beef over medium heat. Sprinkle 1 teaspoon seasoning over the meat, stir it in. When the meat is mostly browned, but still slightly pink, drain the fat from the pan. You can spoon it out, strain the meat and return it to the pain, pour it off, do what you like, but drain the fat from the pan. The meat will continue to release fats, that will be used for the veggies and gravy later, but get the majority of it out now.
Return the drained beef to medium heat. Stir in the onions, carrots and celery. At this time, sprinkle the remaining teaspoon of seasoning over the meat. Cook the veggies and meat over medium heat, stirring occasionally, until the veggies are hot all the way through, but still have a little bit of a 'bite' to them. Sprinkle the flour over the mixture, mix well. You'll notice a lot of fond starting to develop. When the fond is golden and the flour is mixed in, stir in the beef broth.
Continue stirring as you bring it to a boil. Reduce heat, add bell peppers, continue simmering until gravy has thickened and peppers begin to soften.
Remove from heat.
IF YOUR POTATOES ARE HOT: Let the mixture cool approximately 10 minutes, then top the mixture in the ovenproof skillet with the mashed potatoes. Broil until the top is golden at the higher peaks.
IF YOUR POTATOES ARE COLD: Let the mixture cool COMPLETELY, top with the cold mashed potatoes. Bake in a 325 oven approximately 30 minutes or until top is golden and mixture is heated through.
When it's golden, pull out the skillet and dish it up.

You can use whatever veg you like. I had these, so this is what I used. Throw in corn, peas... Any of the 'stew' veg will work. Meaning if you like it in stew, it will work in this. Use leftover meats, leftover gravy, leftover mashed. It's a great, filling, easy dish.

Mil's Braised Pork Chops

Alrighty then. Today really sucked at work. They beat me up. I forgot my camera at the apartment and I really don't feel like going to get it. So this Recipe Tuesday is sans photogs. I apologize. It really is a rum kinda day, the way that SiO2 posted earlier... I'd point you to her recipes... OOH.... HEY!!! SiO2!!! Want a page here to cross-post to? We'll see. Anyway, she's got a locked post over at LJ on some TREMENDOUS rum drinks because yes... It's a rum day. SO pour one up (A Dark & Stormy:take the good ginger beer/add enough of the good gold rum(I like Sailor Jerry cuz its sweet and tastes like it costs more than the 10 bucks it is) to taste, usually about a shot will do ya.Bingo you have yourself a Dark and Stormy no matter what the weather is! OOOOR Mojito/Rum/mint leaves/sugar syrup - you want syrup because plain sugar sits in the bottom of your glass and has to be stirred back in occasionally/club soda -though its rumored you could replace these last two with ginger beer, but I've never tried it. )
There... Properly lubricated and let's go to the kitchen for

Mil's Braised Pork Chops

A note before we start. This is the recipe of a positively DELIGHTFUL 87 year old woman in Albuquerque. Specifically, Dan's grandmother. Strange, as many problems as I had with Dan, his blood relatives were great. His mom was a peach, his grandmother the same (if a little wierd and uptight in a 1950's kind of way), his brother was a doll. Dan... Meh. But Mil had these great pork chops she made. She gave me the recipe a couple years ago. For the parenthetical comments, hear a wavery, 'little old lady from Joisey' voice in your head. That's Mil.

Pork chops (figure 1-2 chops each), 3/4 to 1 inch thick, with bone (more flavor)
Seasoning (Mil would say 'I use the Lawry's', but I'm using Crazy Jane's pepper and salt mixes)
1 envelope onion soup mix
1/2 medium white onion, sliced thin

Prep your chops: Rub your seasoning of choice into each side, let sit at least 10 minutes to absorb the seasoning.
Heat a skillet or saute pan over medium high heat. Throw in the chops. Cook each side approximately 4 minutes. We're going for color and flavor possibilities, not cooking it through. When you flip them over, throw your 1/2 onion in around the chops. Stir it around, make sure it doesn't burn. You can add a tablespoon of olive oil if you want to help with the onions, but I never really do.
When the chops are nicely seared, remove them to the side. Stir in 2 cups water and the soup mix. Get that fond off the bottom of the pan. Return the chops to the pan.
Bring to a boil, reduce heat, cover and simmer about 30 to 45 minutes (depends on the thickness). Cut into them to be sure. I personally don't like pork pink, not chops. The braise actually keeps the pork from drying out. 'Course, it would be better with a well-marbled, not-lean chop, but you work with what you get. (You can also finish it off in the oven, you know, just set it to about 375, throw 'em in for an hour or so, cover with foil). Serve with sides of your choice.

The braising liquid makes an EXCELLENT jus, you can also serve a gravy on the side by thickening up the braising liquid.

***
There. Recipe Tuesday. I didn't fail completely. At least at something, right?

I'm not in a good place tonight, Dear Reader. I really had a shitty day at work. I seriously hate the fact that ... God. How can I put this? I hate the client and the limitations they've put on us as customer service personnel in light of today's litigious society. I can't DO anything. Nothing I do really makes one bit of difference. People call us for parts help. "I've got a (fill in the blank) on order, it's been on order 2 months. When's it coming?" We're supposed to be able to get this expedited, but it never works that way. So I document and tell them 'Gee, we're trying to find out a date when you'll get to drive your car again!'

I can't do anything when someone calls to complain about a dealer. We're just a fucking supplier. It's like calling Proctor&Gamble because your local grocery chain hired an idiot who called you an old hag. It makes no sense. Don't call me a cunt because of it, you know? SO I do my job, which is supposed to somehow be helping people. Everything I do is documented and then the client's various departments (R&D, Tech support, marketing) get a fucking number on a chart to indicate I spoke with Mrs. Smith and her car has a steering problem. They don't see the fact that I spent an HOUR on the phone with Mrs. Smith listening to her call me every name in the book except Jesus, state several times I should be kissing her ass, and all I can do is tell her I can document it. They don't get that. I dont' t think my bosses get that.

I get asked at least once a day if someone can talk to the president of the company. Get this... This is from Wikipedia: (not pointing to the company name cause I really can't AFFORD to be fired)

The share register of Company X makes for interesting reading. The largest shareholder in Company X today is the State of Kuwait, with 7.2%. Followed by Deutsche Bank, with just under 5%. The 3rd largest shareholder is the Emirate of Dubai, with just over 2% of Company X shares.

Breaking the shareholdings by region:

That's the owners of the client. These stupid fucking fuckheads think THESE PEOPLE want to talk to them. These stupid fucking fuckheads think the fact that they/their relatives/their friends are IMPORTANT to the company because they've bought a car. Nobody is important to these fucking conglomerates. They are owners because THEY LIKE MONEY... THEY DON'T GIVE A SHIT. GO KILL SOME OTHER MESSENGER!

jesus I've had a bad day.

No Dairy Choco cake ...

Once again, Dear Reader, it's Recipe Tuesday. As promised, the easy choco cake without dairy. Haven't made it yet, but I'll tell you right now all the proportions are right for something truly nice. It's basically the orange cake, only chocolate.

No Dairy Chocolate Cake (Vegan)

1 1/2 cups all purpose flour
1 cup plus 2 tablespoons sugar
6 tablespoons unsweetened nonalkalized cocoa powder
1 teaspoon baking soda
1/8 teaspoon salt
1 cup cold water
1/4 cup vegetable oil
1 tablespoon white vinegar
2 teaspoons vanilla

PREP YOUR PAN. This means Line the Bottom. Grease and flour the pan if you like. I wish I had lined the bottom of the orange one. Line the pan is preferred. 8x8 size. Brownie pan.
Heat the oven to 350.
Sift together the dry ingredients in a large bowl.
In a separate pitcher, large measuring cup or bowl, combine the wet ingredients.
Stir the two mixtures together until smooth. Scrape the batter into the pan and spread evenly.
Bake until a toothpick comes out clean, 25-30 minutes. Let cool 10 minutes in the pan on a rack. Slide a knife around the cake. Invert the cake, peel off the paper. Let it cool on the rack right side up.

Part of me says throw some cinnamon into this. Just enough cinn... oooh... Allspice. Allspice. Just enough to give the flavor of it through the batter. And I say allspice because it's more of a flavor blend between cinnamon and cloves than anything else.
You could also probably get away with using a little more vanilla as well.
The recipe as written says dust it with powdered sugar or a quick cookie icing. I say make a caramel sauce and drizzle it over the top... Ooooh... No... Not caramel.
Cherry sauce. Yeahhhh.....

Simple cherry sauce. Mom taught me how when she was making her Cherry-O pie...
3 cups cherries, fresh or canned (drain and rinse)
1/2 cup sugar
3 tablespoons lemon juice
1 tablespoon water
1 1/2 teaspoons corn starch

Cook the cherries, sugar and lemon juice over medium-high heat until the berries release their juice. In a separate small container, mix the water and cornstarch. Stir the cornstarch mixture into the cherry mixture and cook until thickened. Let it cool, spoon it on top.
OOOOHhhh.. Yeah. That's it. The cake. With cherries. If you like, you can always stir in a couple tablespoons of butter into the sauce. It'll add body and a gloss to it. I wouldn't, but that's me.

Let them eat CAKE!

What does one make when one is faced with a seeming lack of things to bake with?
You see, Dear Reader, I had oranges and lemons from the cranberry bread (10 oranges for a buck. I had to get the full 10. Sorry. Too good a price- The lemons were 3 for a buck), spices, sugar, flour, vanilla, baking soda... No eggs though, and I really don't want to spend the $$ for eggs...
But I have this program, you see... It's the Joy of Cooking, in computer program form. Great reference, no matter what edition or what form it takes, it's the Joy. So I went digging through the disc. I was looking for something sweet, not a lot of thought or prep to it that would use a lot of citrus.

There's a recipe called UltraOrange Cake (Vegan)... No eggs. It's vegan, right? Wait. It'll require some weird thing that you don't have... No, you have all that... Hm. Ok. Let's make it and see what we come up with.

The original recipe is as follows. My changes are made in the parentheses. And comments follow.

Ultra Orange Cake- Vegan

Preheat your oven to 350 degrees. Grease and flour one 8x8 pan or line the bottom with parchment paper.
Whisk together thoroughly in a large bowl:
1 1/2 cups all purpose flour
1 cup sugar
1 teaspoon baking soda
1/2 teaspoon salt
Add and stir together until smooth:
1 cup orange juice (I squeezed 3 oranges and 1 large lemon and got a cup of juice)
1/3 cup vegetable oil
1 tablespoon grated orange peel (I just grated the peels from 2 of the oranges I squeezed)
1 tablespoon white or cider vinegar (I used cider vinegar)
1 teaspoon vanilla (plus a little splash... I like vanilla)
Scrape the batter into the pan and spread evenly. Bake until a toothpick inserted in the center comes out clean, 30-35 minutes. Let cool in the pan on a rack for 10 minutes. Slide a thin knife around the cake to detach it from the pan. Invert the cake and peel off the paper liner, if using. Cool right side up on the rack.

Now... I like things that don't require a lot of prep, that don't dirty a lot of dishes (I still have to wash them, you know), that use ingredients in new and unusual ways. This uses baking soda and vinegar. C'mon, guys, we all remember the volcano experiment in grade school science class. It foams. It makes foam. When you put that with flour and sugar and flavor, it makes cake, too.


I stirred together the dry ingredients. You could sift, I suppose, but I just stirred really well. Made them fluffy.


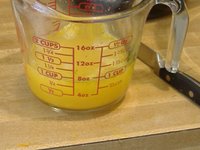
Then I grated the oranges over my 2 cup glass measuring cup, squeezed in the citrus and got pretty much a cup of juice.


Then I added in the oil to bring it to 1 1/3 cups. Then I threw in the vinegar and the vanilla. It makes about a cup and a half of stuff.


Stir it all together, blend in with the dry ingredients. Sing Don Ho's Tiny Bubbles, pour it into the pan.


Tally so far? 1 dirty bowl, 1 dirty fork (my whisk is in the dishwasher already and I'm lazy), 1 dirty set of measuring spoons, 1 dirty glass measuring cup. The dry measuring cups don't get washed. They're shaken clean, rinsed if necessary and put away.
So there's not a lot of dirty dishes with this.
It's quick, easy, not messy.
Hm. It probably tastes like garbage, right?
No. The batter (and no worries about salmonella from eggs with this one) is TASTY. Supertasty, really. So let's see how the cake looks when I take it out...


Hm. Never mind looks, it's just a cake.
But the smell.

Orange-y. Very orange-y. I like this. Let's let it cool, then get it out of the pan for a little taste....


AHA. Hm. It fell apart while inverting the pan. Not pretty. BUT! it didn't stick to the point of can't use it. I'll definitely use parchment next time.
What's that? How's it tas...


OH MY GOD. I love this cake. It's ugly as sin, but it's light, cake-y, moist, orange beyond all hope, smooth... Tastytasty. Mmmmm. Mine. All mine.
Oh. Sorry.
So I'll use parchment next time I make it, but this is a good recipe, even with my machinations into it, and I like not using eggs in it because I'm more likely to have baking soda and vinegar on hand.
Kid friendly recipe, nothing to gross them out, no cutting required (if you use over the counter orange juice), easy to fix.
I wonder how it would taste with just lemons... Hm.
Or blood oranges, or limes......

And now.... Recipe Tuesday. Merry Christmas.

I'm... Hm. I don't want to say I'm a little leery about putting this out on the 'net, but... Well, yeah. Look, if you make it, PLEASE don't say you came up with the recipe on your own. Just say you found it on the 'net. I took quite a long time (years) developing this. It's originally a recipe for zucchini bread that I messed with one year because Dad had purchased too many cranberries. I've made it on 2 continents. It gets eaten, quickly. You can serve it with butter as a breakfast bread, you can put cream cheese onto it (whip it first, it spreads better) for a snack. It's a quick bread. You can bake it in muffins, you can make loaves. You can mess with the spices. I used lemons once, not oranges. I threw ground ginger in by mistake one year. Frost it with any standard frosting or glaze recipe... It changes, but there's never a bad change. All I know is I'm very proud of this recipe. It is mine. Here it is, Dear Reader. As promised...

Darkneuro's Infamous Cranberry Bread
Makes 2 Loaves or 3 doz. Muffins.

1 12 oz. package cranberries
2 cups granulated sugar
2/3 cup vegetable oil
3 teaspoons vanilla
3/4 cup milk
4 eggs
grated peel of 1 orange
juice of 1 orange
2 teaspoons ground cinnamon
1 teaspoon ground cloves
1 teaspoon allspice
3 cups flour
2 teaspoons baking soda
1 teaspoon salt
1/2 teaspoon baking powder

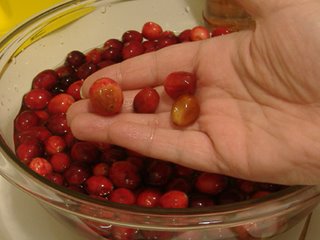
A Note on Cranberries: I buy fresh cranberries, a package per batch. You'd think this is a pound, but it's not. It's only 12 ounces, but it works. First, rinse the berries and pick through them for ick berries. That means you float them in at least 2 inches of cold water. If they sink, get rid of them. If they have a moldy patch, get rid of it. Soft, get rid of it. Mushy, get rid of it. You're looking for whole, ripe, hard berries that float. A slight softness around the stem is fine, but if you've got a soft patch through 1/2 the berry, you had best throw it away. Do not worry about the collateral damage such weaning will cause. You'll have plenty of berries for the bread.


Take this picked-through package of berries and chop them. I use a food processor. I have also used a blender. I really prefer a food processor. If you do use a blender, do yourself a favor and put some of the milk in and use the milk to chop the berries with. You'll need some sort of liquid in the blender, otherwise they just hang out on the sides and you'll get nowhere.


Prep your pans. Loaf pans will need the bottoms greased. I usually just spray them with no-stick, but I've also papered muffin pans, used shortening, used straight vegetable oil... Just the bottom of the pan, so the sides have something to climb up. Also, you'll need to loosen the sides of the loaf pan with a knife when you're ready to cool it down.

Mix your dry ingredients (flour, baking soda, salt, baking powder). I leave the spices and the sugar out of the dry ingredients. I may change amounts on those depending on the taste and smell of the batter. Also, since it needs to melt smooth, sugar and spices get added with the wet stuff.

Prep your citrus. You'll need as much of the peel and all of the juice from the fruit. I use oranges, typically, although I've used lemons in a pinch. You can use 1 of each if you desire, heavier on the orange if you do.


In a very large bowl, mix the cranberries, sugar, oil, vanilla, milk, and eggs. Blend it smooth.
Add the spices. Mix well.


Add the citrus peel and juice.


Taste it. Yes, taste it. Stick in a spoon, swirl it round, dip your tongue to it. TASTE IT. Can it use some more clove? Allspice? Citrus? Sugar? Vanilla? You should have a spicy, vanilla-sweet milky taste with a hint of orange and cranberry tartness. And it should be very liquid. If you hate the thought of eating raw egg, don't, but you really should.


Add the dry ingredients slowly, mixing thoroughly.
The batter should still be rather liquid for a quick bread. I've always thought it looks rather runny.


When the batter is mixed, turn on your oven to 350 degrees.
While the oven is heating, dish it up. Fill your muffin cups, pour your loaves.
Drop each pan onto the counter to make any serious bubbles break apart or rise to the top.

Bake for...
Loaves: 50 to 70 minutes, starting to check it every 5 minutes after the first 45.
Muffins: 25-30 minutes, starting to check it every 5 minutes after the first 20
Use the toothpick/skewer/knife test. If it comes out clean, and the top of the loaf is brownish rather than (this is wierd) greenish (it really does have a greenish cast to it), it's done. Remove from oven.
For Loaves: Cool in the pan for about 20 minutes. Remove from pans (turn it out onto wire racks, towels, etc), cool thoroughly.
For Muffins: Remove from pans immediately, set flat onto a towel or wire rack and cool thoroughly. This will keep moisture from forming on the bottoms.
Store in plastic bags in the refrigerator in a single layer. You can refrigerate it for up to a week, although I would be surprised if it lasted that long. This bread also freezes well. Enjoy.


First Cranberry Bread of the season.... MMMMm.... Tasty. And it's muffins for work on Friday. Strange... I just had 3 dozen... Wait. There's only 2 dozen left. Damn. It's been less than 24 hours... Damn. Ok. So I have enough for another batch, I'll make some more for work. Note to self: Self, stay out of the muffins.


Creative Commons License
This work is licensed under a Creative Commons Attribution-Noncommercial-No Derivative Works 2.5 License.